
Welcome to a crafting extravaganza all week featuring myself and other Artists In Residence from IMAGINE Crafts, along with the Design Team Members of Authentique Paper and May Arts Ribbon.
 |
| by Debbie Gaetz Artist-in-Residence for IMAGINE Crafts |
SUPPLIES USED:
- IMAGINE Crafts/Tsukineko
- Memento Luxe mixed media pigment ink in Rhubarb Stalk; Teal Zeal; Espresso Truffle; Tuxedo Black; Olive Grove
- StazOn Midi solvent ink in Emerald City
- IMAGINE Crafts
- irRESISTible Pico Embellisher in Rose Bud; Clear; Shimmer; Bamboo Leaves
- irRESISTible Colored Texture Spray in Gold
- Monterey Pine Leaf
- Authentique
- New 3x4 Authentic Life Cards
- New Card Making Stacks
- May Arts
- Ribbon (around book and tied to stamped images)
- Art Institute
- Barbara Trombley's Vintage Fine Glass Glitter #618 Peapod
- Paper
- scrap black card stock (65 lb.)
- Miscellaneous
- Red Line Tape (1/8" and 1/4" width)
- Teflon Bone Folder
- Hole Punch
- toothpick
- washi tape
General Tips:
- Use Red Line Tape when adhering to any surface that has the textured spray; you want a strong adhesive because a weaker one might not stay for any amount of time, especially with lots of handling. Burnish the tape down before taking away the release strip to ensure a good attachment.
- When applying the washi tape, burnish that down well to ensure a good attachment.
- Allow over-night drying time for anything you use the Pico Embellisher or GooseBumps/irRESISTible textured sprays on so you won't have any accidental "somethings" sticking to your project work. I say this from experience!
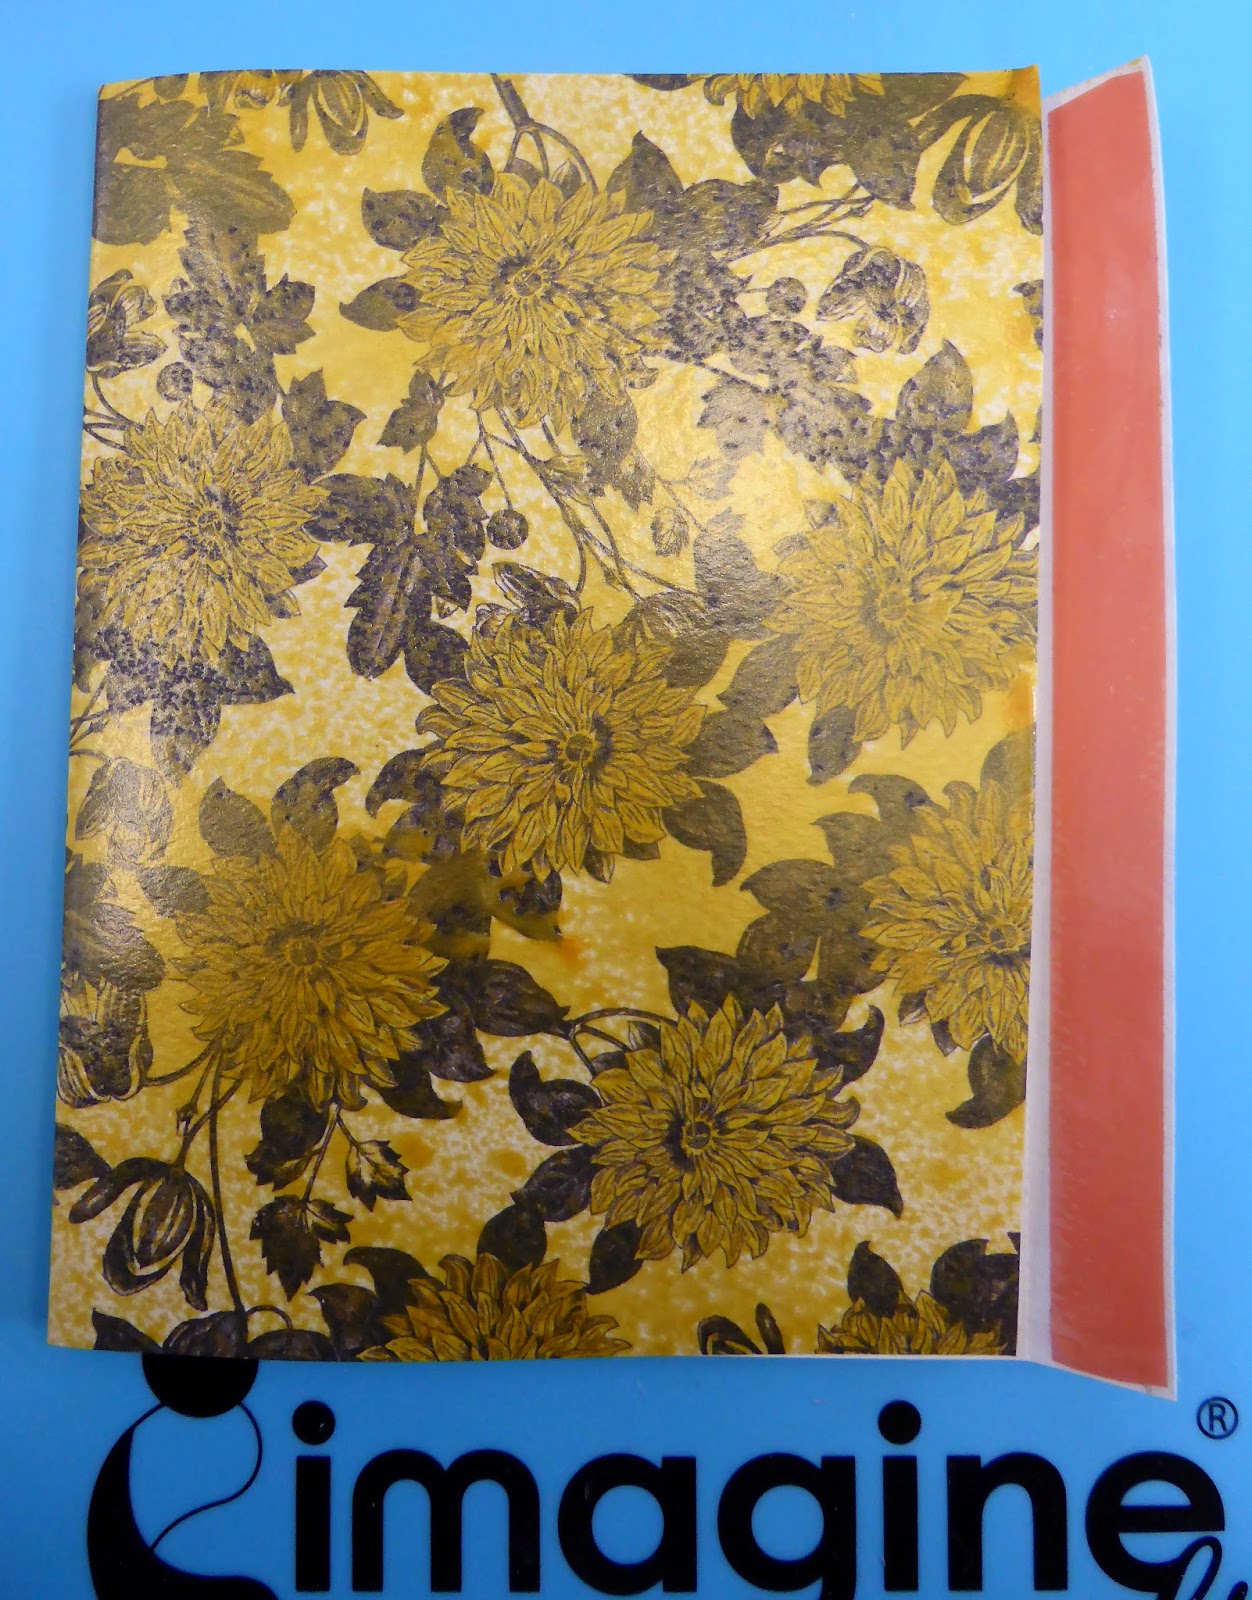
- All of the Authentic Life Cards you select to use will need to have the top trimmed down so the vertical height of the card is 4". The manufacturer was very kind to provide a tabbed length on the Life Card in case you wanted to join them together at the top.

Select the cards you want to use from the Authentique Card Making Stack package. I chose 4. Fold all of the scored lines and burnish with your bone folder. Let the card open and place it in a 'tent position' in your spray box, with the thin flap tucked to the inside of the card.
(tip: The "hill" or raised bump side score line goes INSIDE the fold to retain the size of the card; scoring stretches the paper and placing the hill on the outside of your fold stretches the paper even more.)

(tip: If your bottle becomes plugged, take the spray top and rinse it well under warm water and make sure you clean the spray opening by running your fingernail over it so there is no residue.)

Except for the last page, fold each card with the thin flap left on the outside. Apply 1/2" red line tape to the flip area as close to the outside edge as possible. Apply 1/2" red line tape as close to the bottom edge as possible. Fold over and secure by burnishing with your bone folder. The thin flap that has not been texturized and colored will provide a little contrast if seen.


On the last page, position the card so the flap side is on your left. Using the Authentic Life Card with the bird image and "a little birdie told me" on the bottom, attach it sideways, securely to the inside back page, with the sentiment pulled out to be used like a tab.

With a scrap of black paper, cut a strip the same width and length as the overhang of the Life Card and attach it to the backside to cover up the design showing on the back. I cut the top edge at an angle to make it look like an actual tab; I didn't do it on the bottom so the bird image remained intact.

Determine the length of ribbon you will need to wrap around the booklet and tie a bow; cut it to that length. Place the ribbon across the the front side of the first page, tying end to the right and wrap end to the left. Place something next to the card that you can use a line mark so your ribbon is in the same place on the back card; I used the packaging card to the left and the bottom of the word "Imagine" on the craft sheet. I anchored both ends with heavy objects to I could position it correctly and lay down the adhesive on the back side of the ribbon.

 |
| front |
 |
| back |
With red line tape, adhere your choice of Authentic Life Cards to both sides of each page, including a card placed vertically on top of the card we placed earlier on the inside back page; adhere with red line tape because, again, you're using adhesive on a textured and not a flat surface. I also used a piece of washi tape with torn ends along the inside vertical edge of each card, and burnished the tape with a bone folder. Once all of the cards are adhered (EXCEPT for the front and back cover), place the 1/4" red line tape along the inside edge of the backside of each card. Attach the backside of Page 1 to the front of Page 2; press firmly and burnish with the bone folder. Repeat for Page 2 and 3; and repeat for Page 3 and 4.


I plan to use this 'pocket booklet' to hold stamped images that I can pull anytime to color and embellish for a nice card top. My intention is to immediately stamp the image of any new stamp purchase, and store that in my pocket booklet. I can take this little booklet with me on my travels; it will have stamped images ready to go . . . all I need to do is decide what mediums do I want to take with me, i.e., colored pencils, watercolors, marker pens, chalks, etc. Here's what I'm starting with . . .
I stamped all of these onto Authentique's "Still" paper in the Anchored Collection with Memento Luxe in Rhubarb Stalk; Teal Zeal; Tuxedo Black; Espresso Truffle; and Olive Grove. The map side provides an opportunity to stamp onto it and then color with markers, watercolor and/or pencils. I gathered all of the images together, punched a hole at the top center, and tied them together with a gold cord from May Arts. They now sit in the 3rd pocket card waiting for attention.
 |
| MAGENTA Stamps: Sparrow Stained Glass 0564.O Chickadee on Birch 42.216.P Garden Cats 0630.N Cardinal on Branch 0686.N Mallow Flowers 14.635.P |
My final steps were using the irRESISTible Pico Embellishers. Ink the Monterey Pine Leaf with StazOn Midi in Emerald City, top and sides. Allow to completely Dry. Have the Pico's and glitter ready to use because these next steps need to go quickly. Spread the Pico Embellisher in Clear on the surface of the pine piece. Quickly drop a few bits of the Art Institute glass glitter on the surface. Immediately place dots of the Pico Embellisher in Bamboo Leaves. With the corner of a paper towel, lightly touch the dots of green and let the color bleed into the clear. Allow to completely dry, i.e., overnight. Use the clear Pico Embellisher on the underside of the Pine leaf and position on the front card.
(tip: Do not flood the piece because you still have more product to add to it; if you have too much, it will pour/drip over the sides.)

With the Pico Embellisher, place random drops of the Clear and Shimmer on the flower petals and leaves as dew drops, and the Rose Bud in a few spots for color.

Even though there are several steps that I've outlined, the Authentic Life Cards couldn't be easier to work with to make any kind of booklet that you want. And remember, the irRESISTible Colored Texture Sprays allow you to change the color and/or tone of any paper design for a coordinated look.
My thanks to Authentique and May Arts for providing the papers and ribbons. And my special thanks to you for stopping by. Please be sure to leave a comment on this posting and the other postings in the blog hop for chances to win one of the marvelous prizes in the random drawing at the conclusion of this week's hop.

Here is today’s other featured Artist In Residence project from my friend, Taylor:
Taylor Usry
There's more inspiration to be found on the Authentique Paper and May Arts blogs! Simply visit these blogs to view the projects created by those company's design teams and to view the other prizes available.
Prizes galore for participating in the Blog Hop this week!
All three participating companies in this week's Blog Hop will all be giving away 3 prize packages for leaving comments on the featured blog posts. Each day will we feature projects created by the artists from IMAGINE Crafts, Authentique Paper and May Arts. Simply visit their blogs and leave a comment on each post by midnight PST September 27th. We ‘ll randomly select three different blogs from the seven days, then randomly draw one commenter from each blog as the winner.
Blog Hop Hint – if you click on a link that takes you to a page saying something like, “Sorry this page cannot be found,” just click on the header at the top of the blog (usually a picture, or the blog’s name), and it will take you to that blog’s most recent post. That post *should* be our hop. If not, you can probably scroll down a short way to find the hop post.
Lovely project, your booklet is great. I love that leaf, wonderful texture.
ReplyDeleteBEAUTIFUL booklet Debbie!!!
ReplyDeleteFABULOUS way to use the Card Making Stack & Authentic Life Cards - LOVE the golden texture & shine, can only imagine how lovely it must be in real life!!!
GREAT idea to use it for your stamped images ... you could call it a pocket full of fun :)
THANK YOU for sharing your CREATIVE INSPIRATION, tutorial and top tips too ... I can't believe I've been scoring & folding on the wrong side!!!
This is such rich vibrant coloring i just love the way this pops.
ReplyDeleteWOW!!! So beautiful and creative, excellent use of your products.
ReplyDeleteSue
http://suek86401.blogspot.com/
Very pretty. I like the sprays you used.
ReplyDeleteThanks for all the great tips to avoid oopses. Plus of course the beautiful work.
ReplyDeleteGreat creation and
ReplyDeletelovely work.
Carla from Utah
Lovely little book. I too appreciate the hints of what not to do. Looks like a lot of fun to make!
ReplyDeleteWOW! What a great idea!!! I am definitely going to have to get Authentique's card making stack so I can experiment with them myself!! This is a fabulous creation! Fun, functional and beautiful! TFS!
ReplyDeleteStunning booklet, love how you brought it together, BTW love how green it is where you live
ReplyDeleteThanks for the clear instructions and the thoughtful tips!
ReplyDeletePre-stamped papers would be great - whether for cards or as pages of an album.
ReplyDeleteYour album is beautiful. I love the pages stamped with the birds.
thanks for sharing a great project and giving detailed instructions.
This booklet is amazing..Thanks so much for sharing.
ReplyDeleteSo beautiful and feminine.
ReplyDeleteWow, the colors and patterns in this are amazing!
ReplyDeleteAbsolutely stunning and love the step by step of how to!!!
ReplyDeleteLoving ALL the tips!! Great referral for future projects so am pinning it! Thank you and love the mini especially!
ReplyDeleteGorgeous. LOVE the gold with the bright floral prints and hues.
ReplyDelete<3 J
jwoolbright at gmail dot com
HerPeacefulGarden.blogspot.com
Beautiful project! I love how the sprays transformed the paper. What a neat idea. Love the leaf on the front too. Thanks for sharing.
ReplyDeleteKatie B.
I love the book you made! I wanted to sit and color the images you tucked inside myself. That would be a fun project to do while waiting in a dr's office.
ReplyDeleteGreat pictorial, Very awesome project.
ReplyDeletePretty pocket booklet! TFS!
ReplyDelete