This week IMAGINE Crafts is proud to feature the fun and amazing stamps from Lawn Fawn! Our Artists In Residence are here all week to inspire you with their amazing projects using IMAGINE Crafts' products along with rubber stamps from Lawn Fawn. Be sure to visit both company's blogs daily for ideas, tips and techniques from our design teams.
Lawn Fawn’s photopolymer clear stamps are exceptionally well made and worked wonderfully with the inks I used from IMAGINE Crafts/Tsukineko. I loved the characters and accompanying sentiments in the “Critters in the Attic” stamp set.

SUPPLIES USED:
- IMAGINE Crafts/Tsukineko: Brilliance Pigment Ink in Pearlescent Sky Blue and Peacock (multi-colored ink pad); VersaFine pigment ink in Onyx Black and Majestic Blue; VersaMagic Chalk Ink in Turquoise Gem, Sea Breeze and Niagara Mist; Fantastix Coloring Tools in Bullet Point and Brush Tip
- IMAGINE Crafts: Goosebumps Texture Spray in Shimmer; Ink Potion No. 9 Ink Blending Solution; irREISISTible Pico Embellisher in Wedding White; Ink Blushers
- Lawn Fawn Critters in the Attic Stamp Set LF 708
- Prima: 6x6 Irregular Dots Stencil
- Copic Markers: Cool Gray No. 1, 2 & 7; Prussian Blue
- Spellbinders’ Dies: Classic Squares Small (S4-128); Labels Twelve (S4-247)
- 140 lb. cold press watercolor paper by Strathmore
- 65 lb. black card stock
- Coconut Velvet Paper from SEI
- Decorated paper from Authentique Anchored 6x6 Bundle for base panel
- 118 lb. Conqueror Card Stock in White Diamond (5x5 card)
- Miscellaneous: light blue crystals (source unknown); left-over die cut pieces from blue Mirricard card stock; Scor Tape; Tombow Mono Adhesive; Glue Dots
DIRECTIONS:
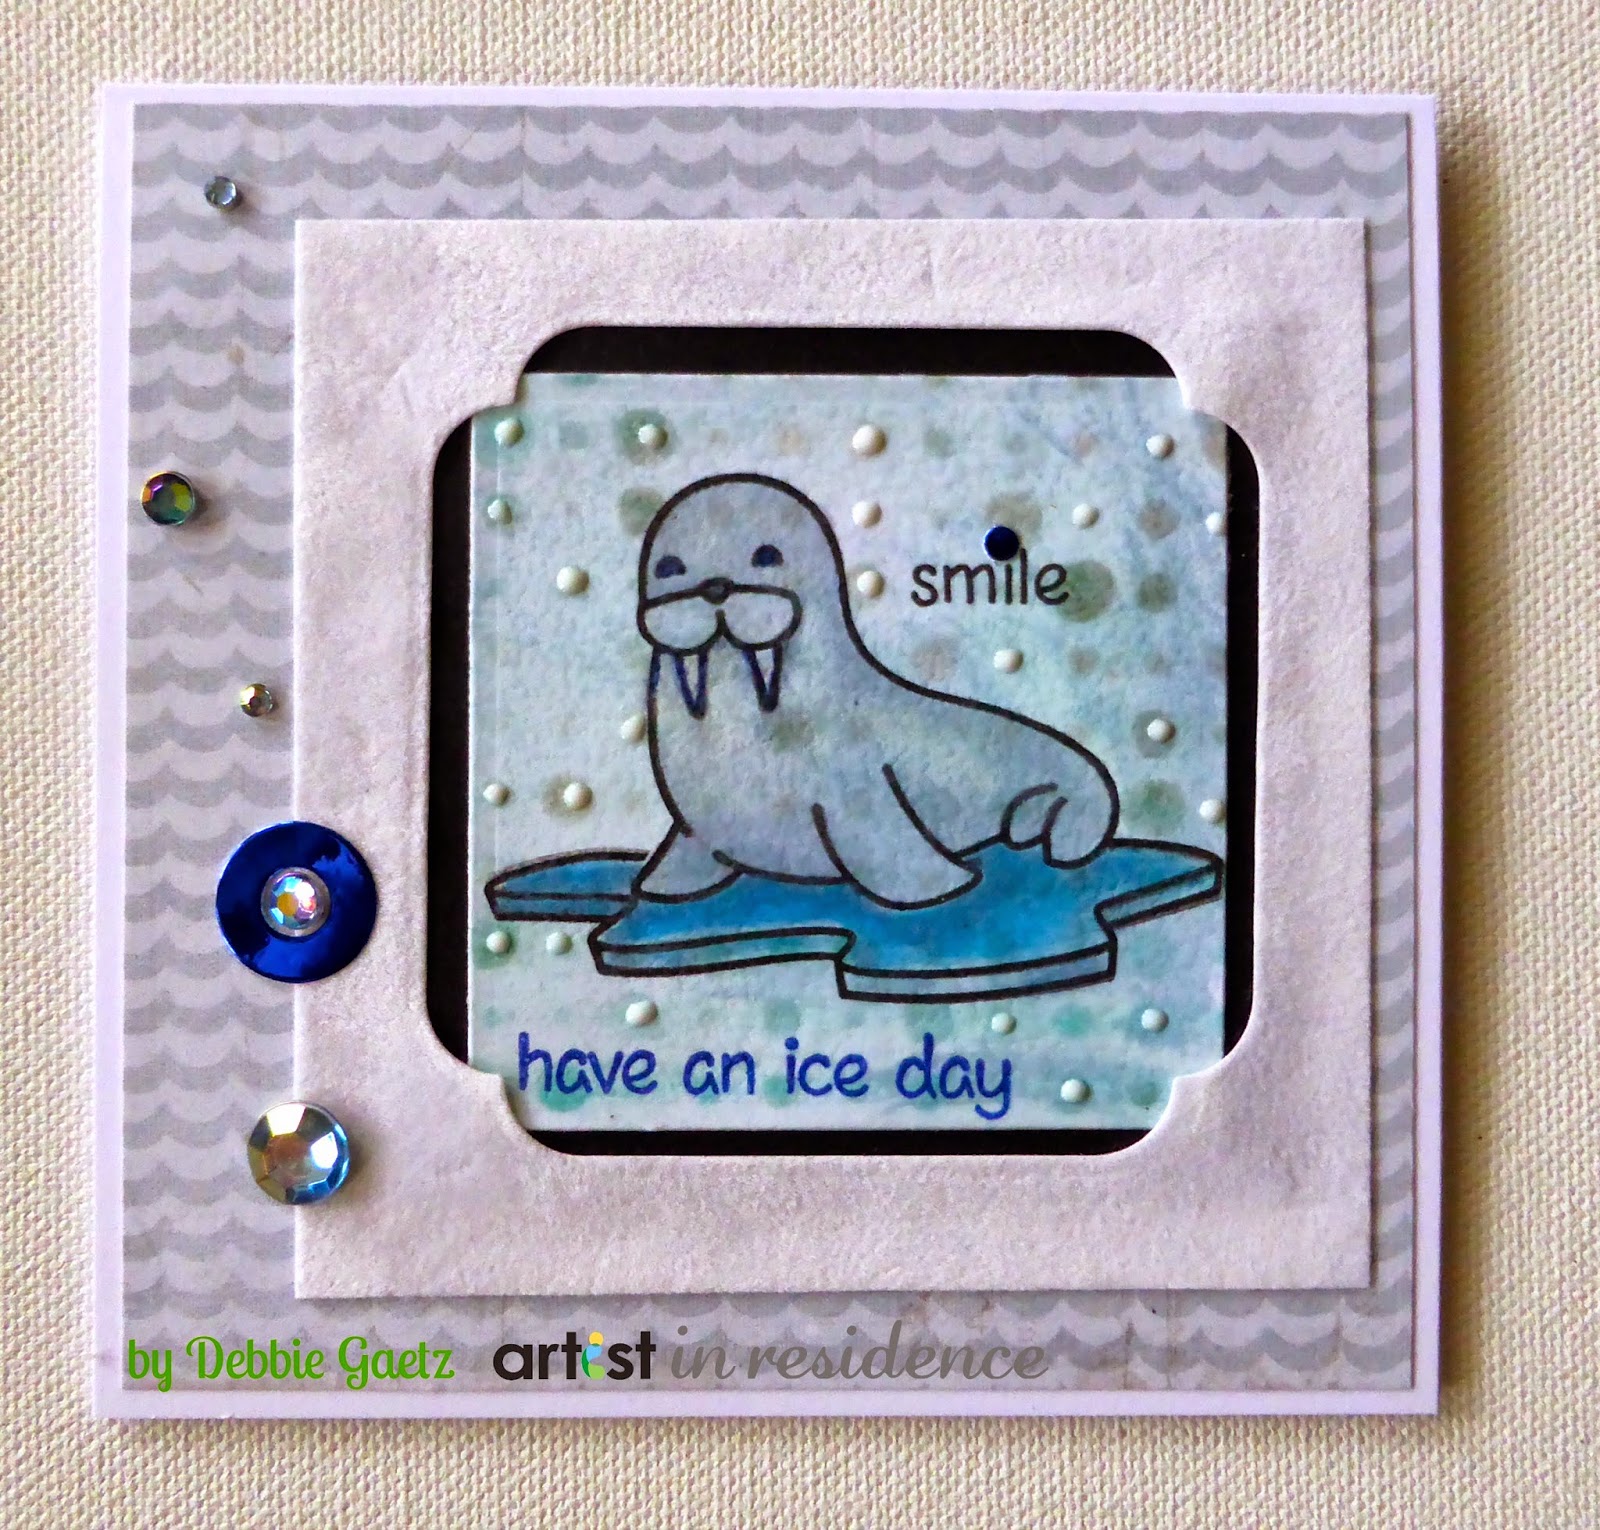
Using the Brilliance Peacock multi-colored inkpad, apply color onto the watercolor paper with an Ink Blusher using the Prima stencil. Spray the paper with Ink Potion No. 9 to blend the colors a little. Allow to dry.

Stamp the walrus and “smile” sentiment onto the stenciled paper with VersaFine in Onxy Black. Stamp the walrus again onto white paper; cut out to use as a mask.

With removable adhesive, tape the walrus mask over the stamped walrus. Stamp the ice flow block so the walrus is sitting on it. Remove mask.
Color the ice flow block with the Brilliance in Pearlescent Sky Blue, and the VersaMagic in Sea Breeze, Turquoise Gem and Niagara Mist using the Fantastix. Color the walrus with Copic markers; use the Prussian Blue Copic Marker on the eyes, nose and outline of the tusks.
Stamp the sentiment “have an ice day” under images with VersaFine in Majestic Blue.

Spray the card stock with Goosebumps in Shimmer. Allow to dry.


Die cut the walrus image with the next-to-the-largest square die. Die cut black card stock with the largest square die. Cut the velvet paper into a 4-inch square. Die cut the center with the largest Label Twelve die so the 4-inch square can be used as a frame.

Adhere the stamped image to the black square die cut. Adhere this set to the base panel card stock from Authentique (4-3/4” square), offset a little to the right. Overlay the velvet frame die cut and adhere with 1/4” Scor Tape along the 4 edges, and glue dots on each inside corner.
Randomly adhere different sizes of light blue crystals on the left side of the card. If you have any left-over die cut pieces from another project that are appropriate, use them; in this case, a wheel and a very small circle die cut were used from a project using blue Mirricard card stock. Place the tiny circle die as a “dot” to the “i” in smile; placed the wheel die cut around one of the crystals.
With the irRESISTible Pico Embellisher, make small white dots on top of some of the background stenciled dots for snow. Allow to dry.
Thanks for stopping by today. We'd love to read your comments!
Wow, love this little guy. He is so cheerful and wonderful, he makes me feel so happy. Nice job.
ReplyDelete