Embossing with SHIMMER SHEETZ for more!
This is the secod part of a 3-part series.
This is such a fabulous technique because it’s simple and lets you make 3 cards with just one partial sheet of SHIMMER SHEETZ! For this second week, let’s resume where we left off and make the second card. Please note you must use the iridescent SHIMMER SHEETZ for this technique to work.
| by Debbie Gaetz |
Supplies you will need: A2 Plain White Card; white card stock for base panel; iridescent colored SHIMMER SHEETZ from Elizabeth Craft Designs; double-sided adhesive sheet; brayer; Silk Microfine Glitter from Elizabeth Craft Designs; vellum and your favorite word stamp for a message strip.
- Use an A2 Card Size
- Cut a base panel 4-1/8” x 5-3/8”
- From a sheet of ScorTape, Elizabeth Craft Designs’ Double-Sided Adhesive sheet, or other double-sided adhesive, cut it to the size of the base panel (4-1/8” x 5-3/8”).
 |
| This is the side that was adhered to the card stock panel last week. You can easily see that the Shimmer Sheet iridescent film layer has been removed from the raised embossed. |
- Remove the protective covering from one side of the ScorTape sheet and adhere the adhesive sheet to the base panel card stock.
- Remove the release sheet (protective layer) from the other side of the adhesive sheet and apply it to the embossed SHIMMER SHEETZ that we used last week, making sure to place the side of the SHIMMER SHEETZ we didn’t use last week onto the adhesive.
 | ||
| This is the reverse side; all of the iridescense is on the SHIMMER SHEETZ. This is the side you want to place on the adhesive sheet.
|

- With the SHIMMER SHEETZ facing you and the release sheet covering it, use a brayer with light to medium pressure to smooth out the adhesive sheet and to make sure the SHIMMER SHEETZ surface adheres to the adhesive. Roll horizontally across the entire sheet and then roll vertically up and down the entire sheet.
 |
| This is how I brayer across the transfer adhesive. |
- Remove the SHIMMER SHEETZ from the base panel, peeling away without touching the adhesive on the base panel; this is when you want to use the other release sheet as a ‘handle’ to hold down the base panel. You will see the background of the embossed design has adhered to the iridescence and the remaining adhesive is on the design.
 |
| After the card panel and the SHIMMER SHEETZ have been separated, leaving the exposed adhesive on the embossed design. |
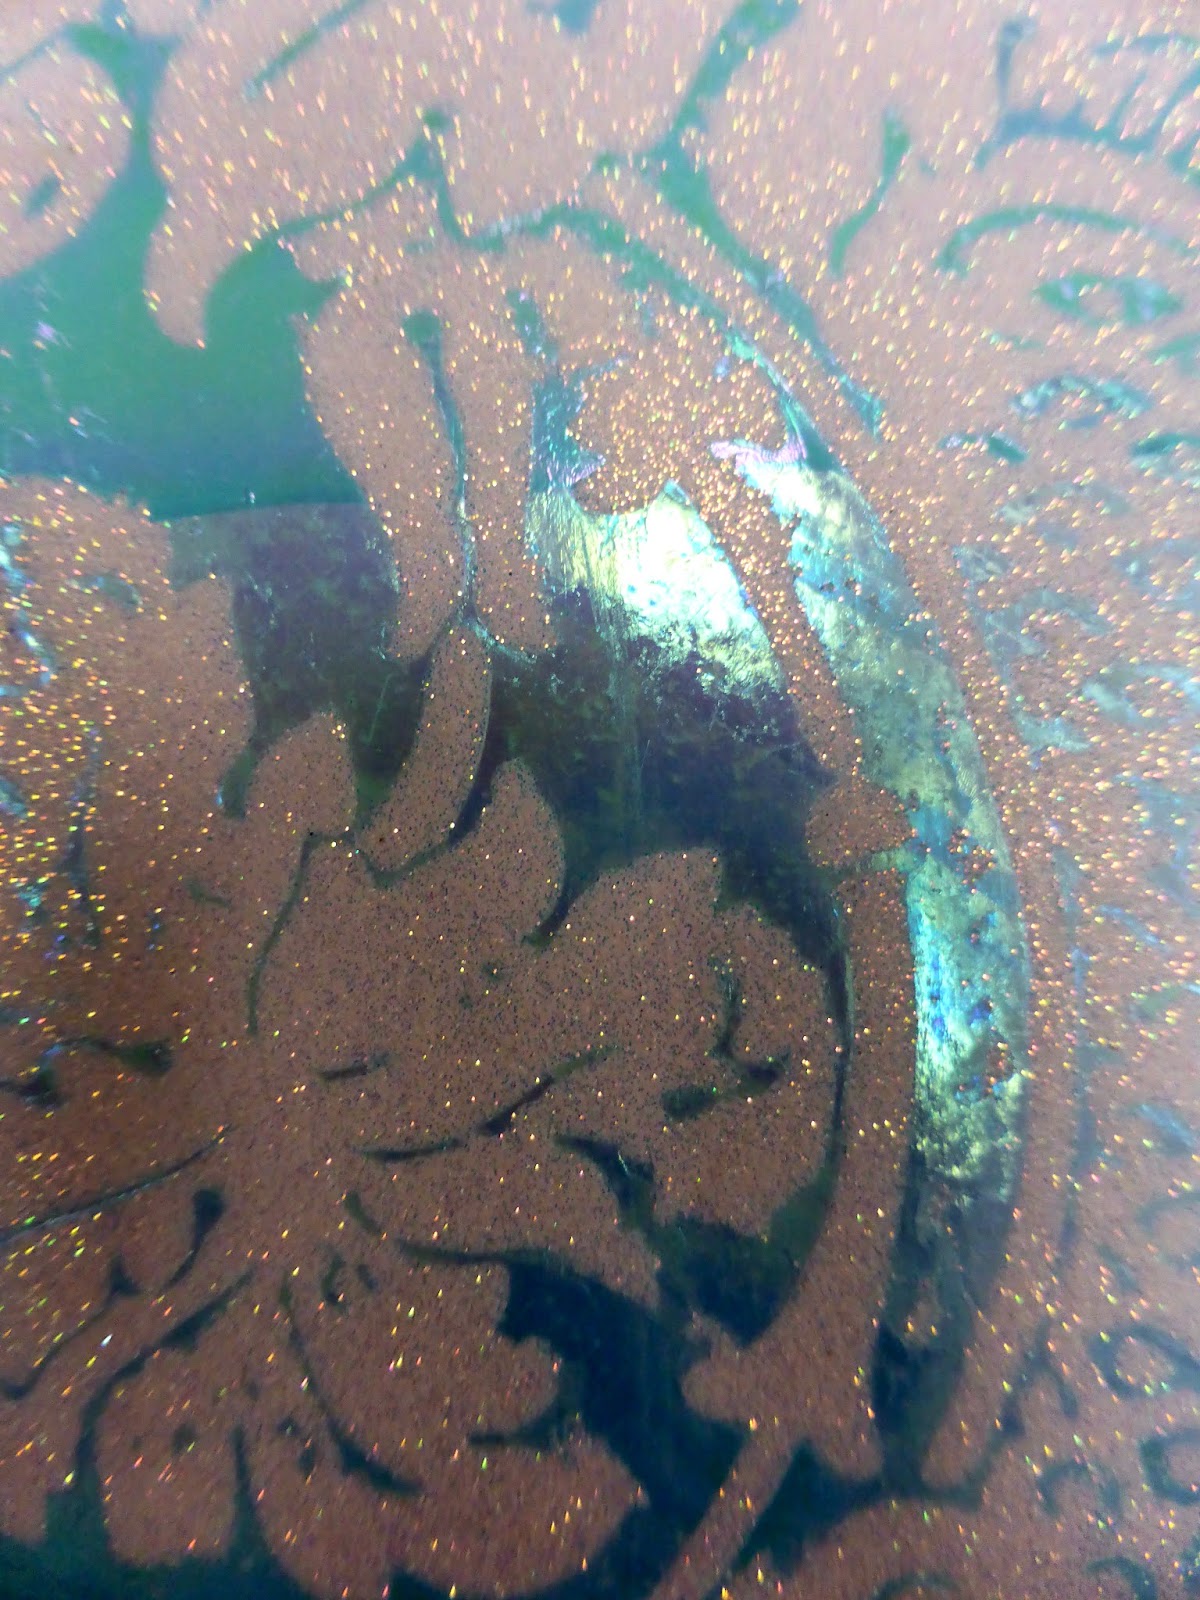
- Sprinkle the Silk Microfine Glitter onto the SHIMMER SHEETZ, shake off, brush off the excess glitter, and then burnish in with your finger and again brush off the remaining glitter. The iridescence of the SHIMMER SHEETZ is still there where it has not been embossed, and the sparkle of the glitter shows on the raised embossed design.
 | ||
| After the SHIMMER SHEETZ has been pulled away from the adhesive sheet, this is what it will look like . . . then apply the Microfine Silk Glitter to the entree surface. Then brush off the excess, and then burnish the glitter in with your fingers really well. Brush off any lingering loose glitter from the card stock panel.
|
- Take a piece of vellum that is wider than the horizontal width of the card and wider than the vertical space needed to stamp your sentiment. Stamp the message with StazOn onto the vellum and let it dry completely. Fold the vellum band around the horizontal width of the card and secure on the back of the base panel. Add a flat-back pearl to each side of the sentiment.
 |
| Stamp the sentiment stamp onto vellum with StazOn. |
- Adhere 5 sequins in a random design on the card front.
Microfine Silk Glitter in Warm Highlights from Elizabeth Craft Designs
MAGENTA Word Stamp: Be You-tiful C07.639.G
Cuttlebug Embossing Folder: Anna Griffin “Acanthus” (5”x7”)
StazOn Midi solvent ink in Spiced Chai
Sookwang double-sided adhesive sheet
Yesterday and today, I have been challenged to complete anything and yet I've been asked to do everything. Make sense to you? Hopefully that situation will change; I hope to be back with another posting tomorrow night. In the meantime, I hope you'll give this technique a try. The second step is sooooo much easier and goes so much quicker.
Thanks for stopping in. See you tomorrow.
awesome technique!!! Love how it came out!!!
ReplyDeleteThank you Stacey! I hope you give it a try.
DeleteI am definitely going to give it a go just got my shimmer sheetz now I just need to order my glitter and tape!! Glad I found your blog!!!!
ReplyDelete