 b
bGood news! Helene is allowing us to keep the Magenta Trunk Show open for another couple of days . . . through some time on Monday. Check it all out at Art 'n Soul.
The Impression Obsession Make-'n-Take is absolutely gorgeous. While you're at Art 'n Soul, please take a few extra minutes to make this card . . .
 |
| Make-'n'Take Card Designed by Impression Obsession |

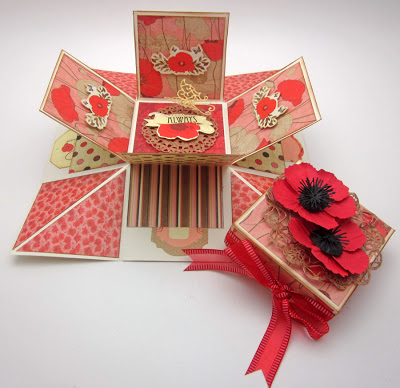
I love poppies and so I must share this Poppy Explosion Box project from Cheery Lynn Designs' blog . . .
Poppy in more ways than one
 |
| by Lori Williams for Cheery Lynn Designs |
"Today I'm sharing a great box with you that I created for Cheery Lynn. I've also worked up a little tutorial for you so you'll be able to make one of these fun Explosion/Poppy Boxes yourself. Have fun!!!

Step 1: Cut two 9 inch card stock squares, cut one 5 1/8" square card stock. Cut four 2 7/8" square designer paper, cut 8 2 3/4 square designer papers for interior.

Step 2: Score one of your 9 inch squares at 3" and 6 ", turn your paper 90 degrees and score again at 3 " and 9". This will create a grid. You'll want to do this on both of your 9 inch card stock squares.


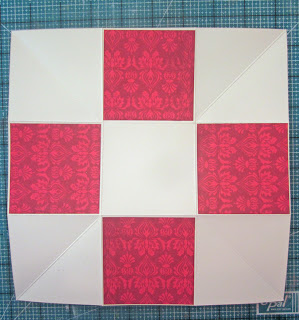


Step 6: On your second 9 inch square cardstock cut the outer corner squares off as shown above. Fold and crease.

Step 7: Tape your remaining square card stock pieces to the just cut cross/9 inch piece. You can also decorate the base center with designer card too.

Step 8: Score your 5 1/8" square at 1 inch on all sides. Cut a slit in where all the black marks are shown above. Fold and crease.

Step 9: Tape your flaps to the inside of the box top creating your top. Now the really fun part decorate as desired.
I created the lovely poppies using my Cheery Lynn Dies of course. Here is a complete list of dies used on this box.


Have a wonder, safe and blessed Memorial Day weekend and I'll see you next week.
Hugs, Lori"
I'm still sorting my way through photos. I'll be back tomorrow with pics from this afternoon's festivities. Hope to see you there!
No comments:
Post a Comment