 |
| by Debbie Gaetz for IMAGINE Crafts®/Tsukineko® |
Using the Tulip Background stamp from Peddler's Pack, I stamped the background image onto Kraft card stock and heat-resistant Acetate using IMAGINE Crafts®/Tsukineko® VersaMagic™ Chalk Pigment Ink in Aegean Blue.


After inking onto the kraft card stock,
I heat embossed the image using white embossing
powder from Judikins.
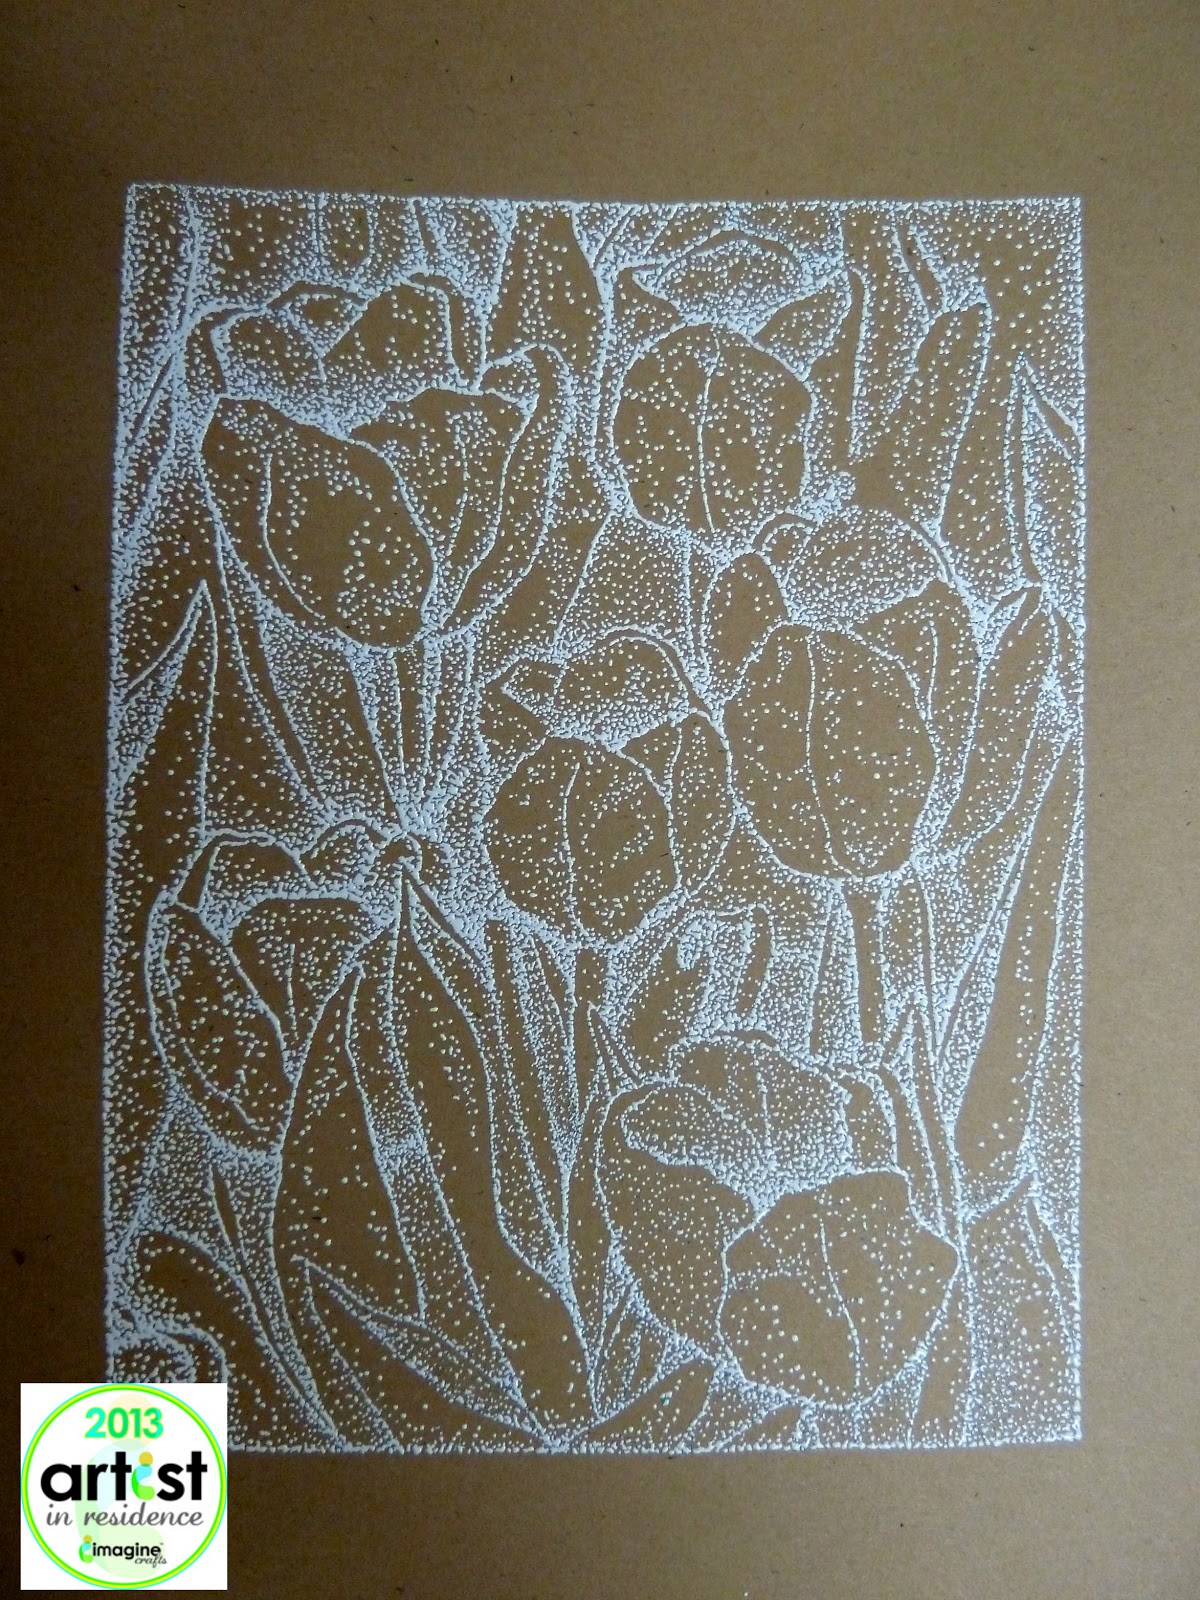
Center the image on the acetate so you will be able to easily trim the acetate down to 4-3/8" wide x 5-5/8" tall with the tulip background stamp centered.
Once the acetate was stamped with the background stamp, again using IMAGINE Crafts®/Tsukineko® VersaMagic™ Chalk Pigment Ink in Aegean Blue, I heat set the image with my heat gun because acetate is a non-porous surface.

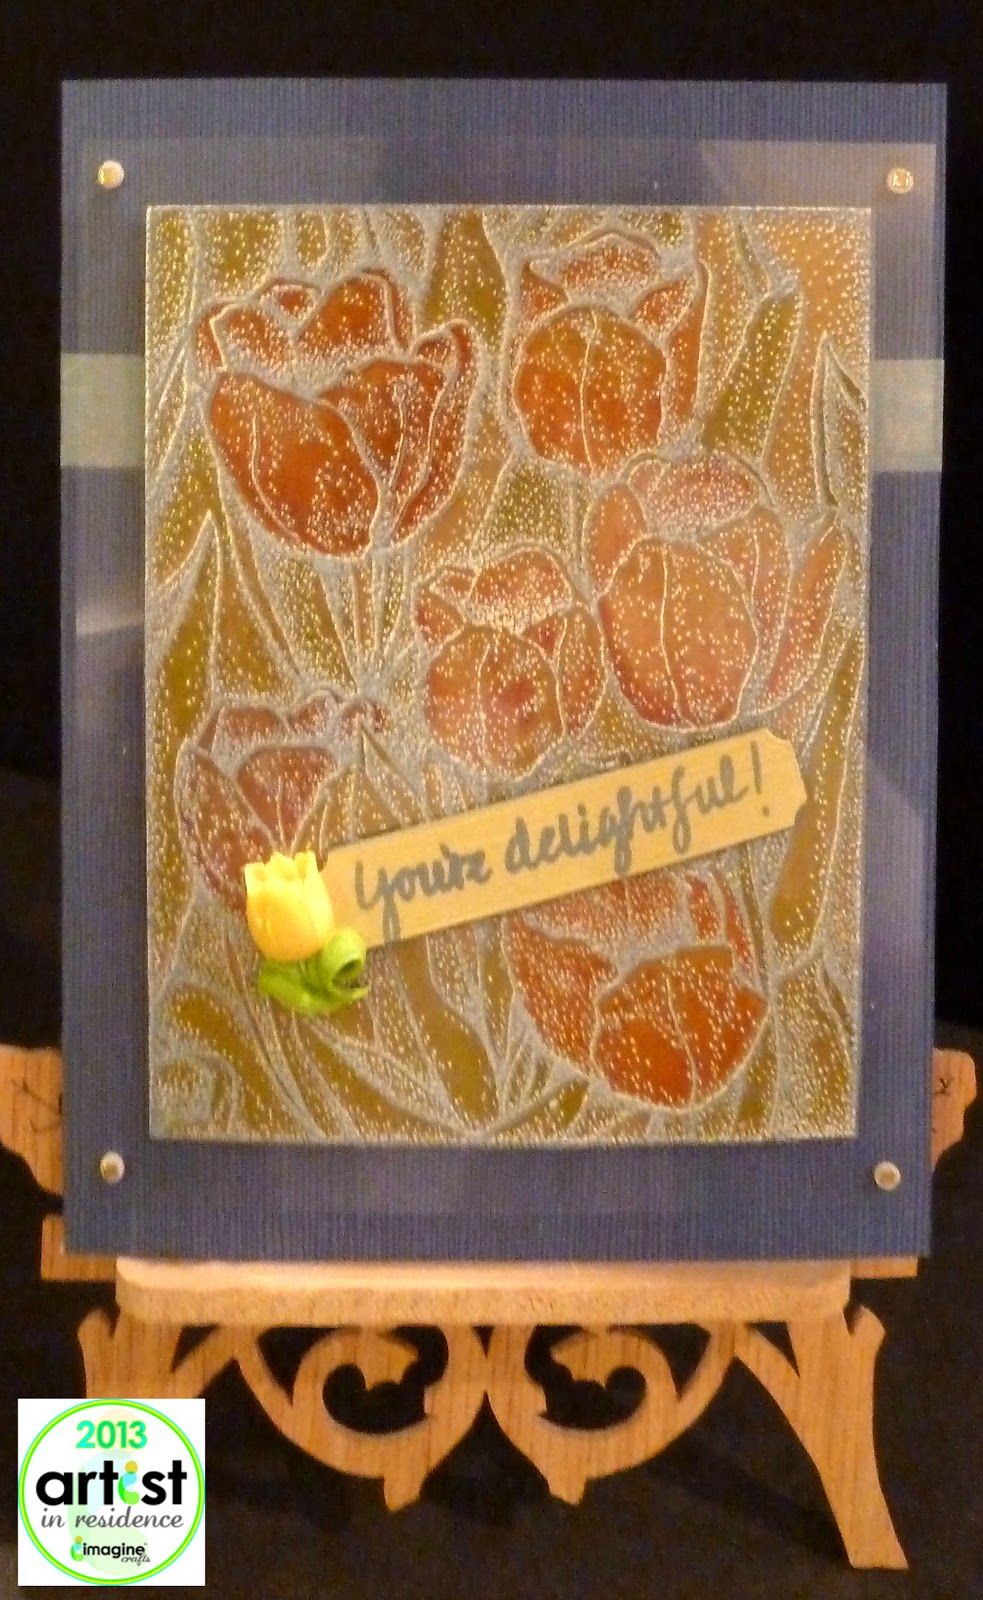
I colored the embossed kraft card stock with the IMAGINE Crafts®/Tsukineko® Memento™ Dual Markers.


The folded card base is made from Hanko Designs' Japanese Linen card stock in Tsumugi Blue. I love to use this paper line for a base card because it has a nice weight and beautiful texture.
The base card paper was trimmed to 9.25 inches x 4.25 inches; scored horizontally 2-inches from the top along the longer edge; and then scored in half vertically for a finished card size of 4-5/8" wide x 6-1/4" high.
I used a scrap of washi tape and ran it along the horizontal score line on the front and backside of the card base; this was the only way I knew for certain that the washi tape would be exactly straight.
 |
After coloring, I trimmed around the background stamp along the border (4-1/8" wide by 5-5/8" tall).


Adhere the trimmed background image to the card base.
Place the trimmed acetate on top of the embossed card stock layer and adhere with foam mini pop dots, centering the acetate design over the embossed design and then moving the acetate ever-so-slightly to the right so the blue of the acetate stamped image will show against the white embossing lines. If you place the acetate design exactly on top of the embossed design, you'll lose the contrasting colors. Both placements look nice; however, I liked the 'adjusted' placement because it looked more like a stained glass effect.
On a scrap piece of yellow cardstock, stamp "you're delightful' stamp with the IMAGINE Crafts®/Tsukineko® VersaMagic™ chalk pigment ink in Aegean Blue.
Die-cut the words with a label and outline the die-cut with the VersaMagic™ ink. Adhere with foam-mount tape to the acetate on a diagonal. Add the resin Tulip embellishment from Webster's Pages.
To camouflage the mini pop dots at each corner of the acetate, apply a small gold dot peel-off.

Thank you for visiting my blog and allowing me to share my latest project for IMAGINE Crafts®. I hope you'll try a similar card using IMAGINE Crafts®/Tsukineko® VersaMagic™ Chalk Pigment Ink. The soft opaque chalk-like colors look beautiful on dark card stock, and I really like how it looks on kraft card stock. The VersaMagic™ also works well on the acetate; I highly recommend the heat-resistant acetate so you can heat set the color since it's a non-porous surface.
SUPPLIES:
IMAGINE Crafts®/Tsukineko® VersaMark™ Watermark Ink
IMAGINE Crafts®/Tsukineko® VersaMagic Chalk Pigment Ink
- Aegean Blue
- Leaves and Stems: New Sprout, Pear Tart
- Pink Tulips: Angel Pink, Rose Bud, Lilac Posies
- Orange Tulips: Canteloupe, Tangelo, Potter's Clay
HANKO DESIGNS -- Japanese Linen Card Stock
- Tsumugi Blue
White Embossing Powder by Judikins
Tulip Background Stamp by Peddler's Pack
Peel Off (gold dots)
Mini Pop Dots
Resin Tulip by Webster's Pages
Acetate (heat resistant)
Kraft Card Stock
Washi Tape
No comments:
Post a Comment