 |
| by Patti Highlands |
 |
| by Patti Highlands |
 |
| by Patti Highlands |
 |
| by Patti Highlands |
 |
| by Patti Highlands |
 |
| by Patti Highlands |
 |
| by Patti Highlands |
 |
| by Patti Highlands |
 |
| by Patti Highlands |
 |
| by Patti Highlands |
 |
| by Patti Highlands |
 |
| by Patti Highlands |
Patti also made this beautiful card. Notice the ribbon she used along the bottom . . . I have to say it wasn't one of my favorites among the many gorgeous ribbons we sell at Art 'n Soul. Adding the pearls, Patti made this ribbon more desirable for future projects. She also used it the same way on the front cover of the book. Thanks, Patti!
 |
| by Patti Highlands |
From Cheery Lynn Designs . . .
Clean and Simple
 |
| by Sandy Hulsart for Cheery Lynn Designs |
"Sandy, here with you today. Sometimes it is nice to make a clean and simple card without all the fancy embellishments. That is what I have created today. I love long/tall cards. This one is 4 x 9.25 inches and fits in a business envelope. Using just the center drop out from my Mexican Tile Pattern die, I die cut three white squares which I mounted onto pink, then black card stock. This is what the complete die looks like.....
The outer blue frame cuts as one piece and the inner white square is another. I simply cut my card stock 2.75 inches square, centered it on the die and cut it out. For the center flower, I used my Stacker Flower 4, cutting it three times and then gluing them together so the petals are staggered. I added a bit of curl to the ends of the petals for some dimension."
 |
| by Sandy Hulsart for Cheery Lynn Designs |
From Impression Obsession's blog . . . I've always wanted to use the brick background stamp myself but it never seemed to work with the brown, black or terra cotta red that I thought I needed to use. Lesson learned!
Tuesday T&T It's Still About Those Dies by Shirley Ross

"I've wanted to use Cover-A-Card Distressed Brick for some time, so that is how I started this card:

BACKGROUND:
- Stamped CAC Distressed Brick with Memento Toffee Crunch on both white and natural cardstock and decided on the natural.
- Die Cut and embossed Spellbinders Radiant Rectangles for the background and the sentiment.
- Used the same template for the background as a stencil for the Distressed Brick and mounted it on the die cut.
- Taped the back center of the die cut and mounted a piece of natural cardstock 4"X6".
DIE READY:
- It's about the connected dies!!! Some I like connected and some not. The nots I simply cut with my wire cutters. BE CAREFUL. Make sure the sharp bottom side of the cutter is even with the die and the connector, not overlapping the edge of the die. ;-) If it's still rough, a file smooths mine just fine.
- I use leftover paper scraps for my smaller dies. :-) Yes I save paper. LOLOL If you look at the flower dies on the pink, there is a small hole in the back. I tried pins, etc, and sometimes it worked and sometimes it would go right through the cardstock or the vellum, like I am using here. I found that a Kabob skewer, like the one next to the wire cutters, worked really well without puncturing the paper.
- Below are the dies I used with the papers:

- The first die cuts (upper right hand corner)are from Layered Floral Set on pink vellum. The dies cuts were also embossed, then embossed from the back with a stylus. The top layer was reversed for effect. The underside of the bottom layer has a 1/16" pop dot.
- The spiral flower is from Spiral Flowers and cut from vellum and white cardstock to see which one I liked best. To do the flower, I used Tweezer Bee as shown below. You squeeze it to open it. It grips the end of the paper while you twist it around (embossed petals on the inside until you fold them out. I also used a thin line of Glossy Accents. At the bottom I added some Glossy Accents to the dot and pushed the top roll on it. It is attached to the cardstock with a glue dot. A tiny bit of GA goes a long way and dries faster.

- Vine was used to help set the flowers and the leaves.
- The leaves are from Leaf Cluster.
- Those little butterflies are from Butterfly Set on white vellum, painted with a Memento Dandelion marker on the underside, and a line of Viva Decor Hematite was done down the middle of each one.


- The vine was mounted, then the flowers, and the leaves on the left.
- The sentiment is from the clear stamp set Hydrangea and is stamped in Fluid Chalk Deep Green.
- The flower centers were embellished with Stickles glitter glue. The leaves, butterflies, and pearl hearts were mounted with GA and pop dots.
A fun card and I learned from doing this too. I had the Tweezer Bee but had never used it. One try with some needle nose pliers and I was sold. :-) Thanks for stopping by and see you back here for DT Thursday."
Shirley
From Millsrepco's blog . . .
Blooming Vine Card by Jenny Griffiths
"Just this week the Blooming Vine die arrived and I couldn't wait to try it out. I absolutely love the graceful curved vine and delicate flowers---so pretty!
After cutting two from green card stock and another two from cream, I snipped the cream flowers off, glued them onto the green vines (use those tweezers) and added a touch of light orange marker to the flowers and gemstones. There is also some shading on the vine leaves with green marker.
I positioned one vine intact onto the card over the layered panels. The second vine was cut into segments and added around the Large Circle Burst and the Thank You sentiment which was scissor trimmed on the right side to fit into the circle curve. To adhere the delicate vines, hold the vine with tweezers and carefully dab tiny amouts of Tombo Mono Aqua liquid glue onto the reverse side--if you over do it, glue will goosh out (a real word) and need to be blotted off immediately. A little dab will do ya. I prefer this glue as it doesn't leave a trace where its been wiped off.
 |
| by Jenny Griffiths |
Materials
98470 Blooming Vine Die
98478 Large Circle Burst Die
B1751 Thank You Combo Stamp
77905 Mango Distressed Dots Paper
Copic Markers YR02, G82, YR15
Dreamweaver Glitter Technique
From Spellbinders' blog . . . from the moment I saw this 3-D Embossing Folder from Spellbinders, I've loved it. Look how Ken made this design into a beautifully framed piece of art!
| Creating Framed Art with Ken Oliver |
"Hey everybody, I am really excited to have the opportunity to guest blog today as a Spellblogger! One of my favorite new releases this year has been the 3-D M-Bossabilities folders. The folders let you add beautiful sculptural embossing to your projects and the designs are so beautiful, you even frame them as art. Today, I am going to show you how to create this beautiful framed art in about 20 minutes…it’s really easy and the finished project is gorgeous. It makes a perfect gift, and it’s a beautiful addition to any room. Everyone will think you’re a crafting genius when you create this piece.
Here’s what you’ll need:
GC-001 Spellbinders™ Grand Calibur® Machine
E3D-001 Spellbinders™ 3D M-Bossabilities™ Shell Beauty Folder
GC-012 Spellbinders™ Grand Calibur® Junior Raspberry Spacer Plate 8.5 x 6
F-012 Spellbinders™ Precious Metals Premium Craft Foils
Sand Paper or Sanding Block, soft cloth or paper towel
Instructions:
Watch my “how to” video here…I’ll show you start to finish how easy it is to create this stunning piece. You’ll have to watch to see how easy it is.
When you create this piece of framed art, you will look like a craft rock star…you will be the only one who knows that it was really easy. I think you are gonna want to try this for yourself.
Thanks for letting me share this project with you today, I hope that you will be inspired to create your own framed art with Spellbinders 3D M-Bossabilities folders. I used premium craft foils in this project, but you can also use card stock, watercolor paper, or just about any embossable medium…you can even sculpt this with polymer clay. Your possibilities are unlimited when you Explore Beyond with Spellbinders. You can see more of what I’ve been doing over at my blog at Ken’s World in Progress.
Go create something beautiful today!"
Ken
 |
| by Ken Oliver for Spellbinder Paper Arts |
Here’s what you’ll need:
GC-001 Spellbinders™ Grand Calibur® Machine
E3D-001 Spellbinders™ 3D M-Bossabilities™ Shell Beauty Folder
GC-012 Spellbinders™ Grand Calibur® Junior Raspberry Spacer Plate 8.5 x 6
F-012 Spellbinders™ Precious Metals Premium Craft Foils
Sand Paper or Sanding Block, soft cloth or paper towel
Instructions:
- Place Plate B Embossing Plate 8 ½” x 12” (included with the Grand Calibur) flat on your work surface.
- Place 3-D M-Bossabilities™ Shell Beauty Folder on top of the Plate B Embossing Plate 8 ½” x 12” with Spellbinders logo facing up toward you, the hinge of the folder will be at the top.
- Open the folder.
- Place 5x7 craft foil on the bottom half of the open folder
- Close the folder over the foil.
- Place the Spellbinders™ Grand Calibur® Junior Raspberry Spacer Plate 8.5 x 6 on top of the closed 3D M-Bossabilities Folder.
- Insert the stack of plates/folder into the front of the Grand Calibur and turn the handle slowly to feed the plates through the machine.
- After the plates have passed the machine, place the plates back on the table and remove the top plate Junior Raspberry Spacer Plate 8.5 x 6 from the stack.
- Open the 3-D M-Bossabilities folder to reveal the embossed foil.
- Leave the foil on the 3-D Folder and sand the surface of the foil lightly with sand paper or sanding block to highlight the 3-D M-Bossed details. After sanding, remove any foil dust with a soft cloth.
- Place embossed foil inside of a 5x7 frame to complete the project.
Watch my “how to” video here…I’ll show you start to finish how easy it is to create this stunning piece. You’ll have to watch to see how easy it is.
When you create this piece of framed art, you will look like a craft rock star…you will be the only one who knows that it was really easy. I think you are gonna want to try this for yourself.
Thanks for letting me share this project with you today, I hope that you will be inspired to create your own framed art with Spellbinders 3D M-Bossabilities folders. I used premium craft foils in this project, but you can also use card stock, watercolor paper, or just about any embossable medium…you can even sculpt this with polymer clay. Your possibilities are unlimited when you Explore Beyond with Spellbinders. You can see more of what I’ve been doing over at my blog at Ken’s World in Progress.
Ken
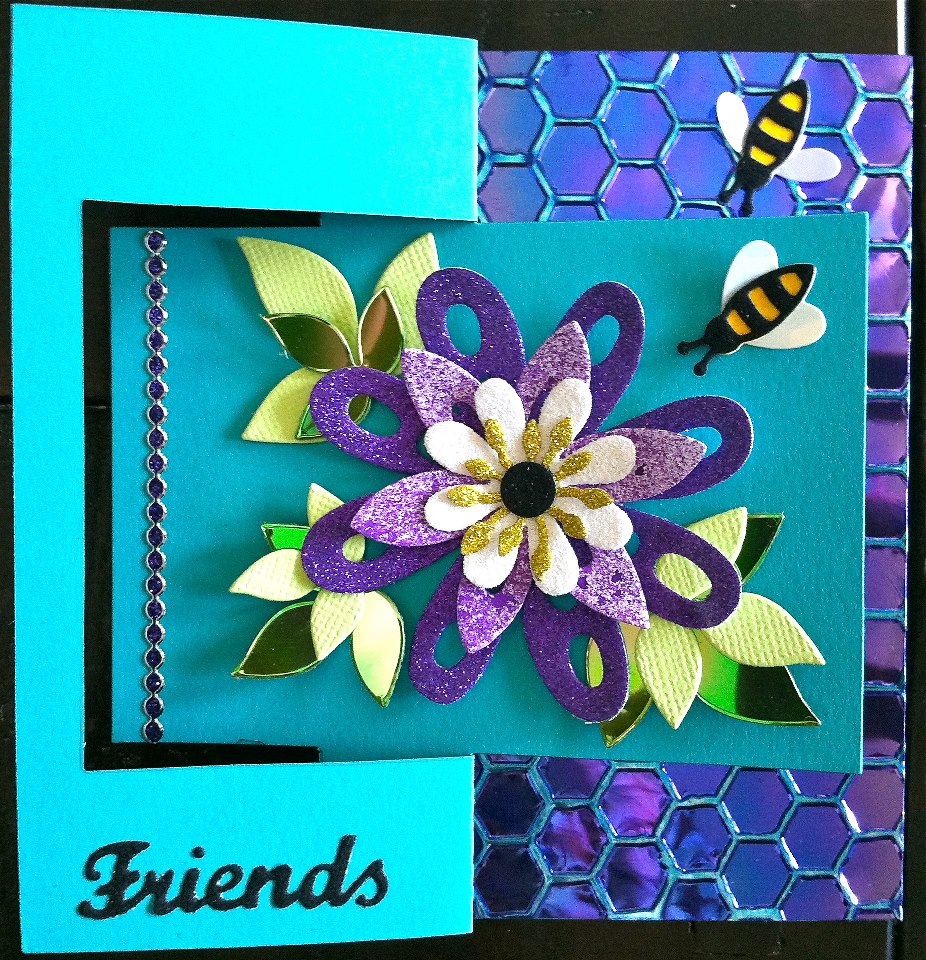 |
| by Els for Elizabeth Craft Designs
"Another Flip It card but I used our Flowerset, Leaves, Bees and word dies for this one. I used Cardstock, Silk Microfine glitter, Shimmer Sheetz, the Velvet Adhesive sheets and a glitter line on this card. This is another card we will make at the Collins show, at the Stamp Escape organized by the Cat's Meow and maybe a little bit different in Calgary at Paper Pastimes as well."
|
More 'what's new' from Memory Box and Poppy Stamps . . .
 |
| Large Hayward Chair D29 |
 |
| Small Hayward Sofa C293 |
 |
| Small Hayward Chair C292 |
Stop into the store asap and see the whole new collection that will be released this coming Monday . . . we're getting ready to send our order in! If you're unable to stop in, please give us a call and we'll help you put your order together . . . 360.357.6820!
CORRECTION . . . If you saw the following message before I could return to the edit page, you should erase it from your mind, memory and thoughts. I spaced out on today's date because I was working on something mid-month next month and was still thinking it was the day before the 3rd Friday of the month! Silly me!
"We'll see you again tomorrow! Are you going to join in on Play Day at Art ' Soul tomorrow . . . anytime between 10:30 a.m. and 4:30 p.m. . . . no cost, just bring your stuff and have fun!" -- BAD INFO! Play Day is the 3rd Friday of the month! Sorry.
"We'll see you again tomorrow! Are you going to join in on Play Day at Art ' Soul tomorrow . . . anytime between 10:30 a.m. and 4:30 p.m. . . . no cost, just bring your stuff and have fun!" -- BAD INFO! Play Day is the 3rd Friday of the month! Sorry.
No comments:
Post a Comment