AIR Tutorial Embossing
"I have waiting excitedly for what seems like an eternity to be able to share my first post as an Artist in Residence for Imagine Crafts/Tsukineko. Tsukineko has always been my ink of preference, I love the quality of it and the colours - well, they are just divine....
Imagine Crafts/Tsukineko Products:
- Memento Morocco Ink
- VersaMarker Pen
- Embossing Powder - Gold
- Sponge Dauber - 3 piece
· Preferred Partner Products:
- Spellbinders Grand Calibur® Machine
- E3D-002 Creative Cogs Spellbinders™ 3D M-Bossabilities™ folder
Other: Beacon Adhesives - Zip dry Paper Glue, Scor-Pal® 1/2" Double Sided Tape, Handmade lace, scissors or distressing tool
Start by embossing the Kraft card using the Spellbinders Creative Cogs 3D M-bossabilities. Sponge using a large Dauber and Tsukineko Vintage Sepia Versafine ink- highlighting some of the areas, as shown in the photo below.
Using a Versamark Pen highlight some of the Cogs and raised areas, working quickly so the Versamark does not dry. Heat emboss using Tsukineko Gold Embossing Powder.
Using a small Dauber and Memento Morocco Ink, sponge over some of the areas to add further highlighting - the amount of sponging is totally up to you - there is no right and wrong.
Thank you for your comments and all of the support you give me - you make blogging such an amazing place to be!! Your encouragement is such a blessing for me - it makes my day! God bless you!"
{{{hugs}}}


From Penny Black's blog, a beautiful project from Elizabeth Allen . . .
"For the last four days, we’ve featured creations from some of our talented designers, and today is no different. . . today we have quite a treat from Elizabeth Allan – a very detailed step-by-step tutorial for this gorgeous notepaper box made from materials you most likely have in your paper crafting arsenal. Amazing!
 |
by Elizabeth Allan for Penny Black Stamps  |
Instructions
Cut 2 pieces of mat board for the front and back covers of the box and one for the spine.
Stamp Glory of Modesty on cream cardstock with Crimson Pearlescent Brilliance ink. Spray with Gold Psst Sheer Shimmer Spritz to add glitzy glimmer.
Position, center and adhere the mat boards to the back of the stamped paper leaving 1/8″ between the covers and the spine. Wrap the cardstock around the edges of the mat board to create a finished edge.
To finish the inside, stamp Indian Wheel in Wheat VersaMagic on cream cardstock and adhere to the mat boards covering the raw edges wrapped around from the previous step.
Create an open-faced box from recycled cardboard. Prime the surface with Gesso and then paint with gold metallic acrylic paint.
Adhere the finished box to the inside right panel of the book and fill with note paper.
Stamp Love Chapter in Smokey Gray VersaFine across the bottom of a small piece of white cardstock. Ink the edges with Peanut Brittle Memento ink. Adhere to a slightly larger piece of mat board edged with Crimson Pearlescent Brilliance ink. Attach to the front of the note box with Power Adhesive Tabs.
Stamp Kisses in the Sun on white cardstock with Onyx Black VersaFine ink and heat emboss with clear powder. Color and trim the image. Attach with dimensional foam tape. Accent the butterfly and flowers with Star Dust Stickles.
Finished size: 5/8 x 3 ½ x 4
Supplies:
Penny Black Stamps: Kisses in the Sun 4306L, Glory of Modesty 40-206, Indian Wheel 40-202,Love Chapter 30-163
Penny Black Mix & Match Cardstock: Storm 01-001 (White), Sticks & Stones 02-001 (Cream)
Copic Markers
3M Scotch: Dimensional Foam Tape
Imagine Crafts/Tsukineko: Onyx Black VersaFine, Smokey Gray VersaFine, Crimson Pearlescent Brilliance, Wheat VersaMagic, Peanut Brittle Memento, Gold Psst Sheer Shimmer Spritz, Jumbo Sponge Dauber
Tombow: Power Adhesive Tabs
Ranger: Star Dust Stickles
Other: Mat Board, Recycled Cardboard, Gesso, Gold Metallic Acrylic Paint, Mod Podge (used as an adhesive)"
From Elizabeth Craft Designs . . .
I had so much fun yesterday at the Gelli Arts class at The Frenzy Stamper in downtown Old Scottsdale. My gelli pad that I ordered a week ago should be at home when I return on Tuesday. I have lots of experimental ideas in my head to try out that I hope will turn into a class at Art 'n Soul.
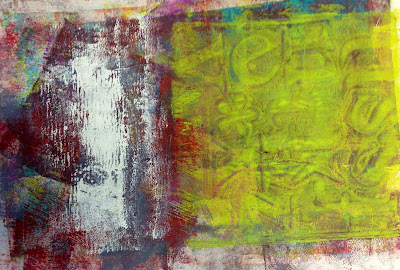
Here are the paper designs the 5 students and the instructor made on our Gelli Pads using acrylic paints, a brayer, and lots of stuff to make the designs. Jane took us through many stages of paper design, starting with the basic one color and do nothing else step.
 |
| the pin dots that you see are actually braille print |
 |
| the lines on the left are made from cotton string placed on the gelli mat before brayering |
 |
| the circles are made from large packing plastic pressed onto the gelli mat after the paint was brayered on |
 |
| the pink lines on the right are made from a piece of gutter protector |
 |
| the pattern on the upper right was made from an embossed piece of wallpaper |
 |
| the pattern on the left is from a doily |
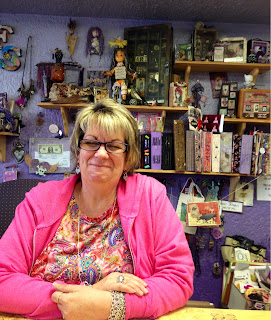
Our instructor's name is Jane Eileen and I'm hoping she'll find her way to Art 'n Soul sometime this year to share her artsy ways with us. She, Mary Jo McGraw and John Petersen would make a dynamic trio!
 |
| I'm holding the canvas journal book we made with our Gelli Art papers, bound with a pamphlet stitch. Jane Eileen is a delightful teacher and I look forward to meeting up with her again soon! |
The Dylusions Journals arrived yesterday, just in time for Art 'n Soul's Journal Club meeting. Dianne sold most all of them, so I think we'll be reordering more for the store. I read that any serious art journalist will own two of these . . . one to work on and another one that is waiting for the artwork to 'dry' before continuing on. Sounds good to me!
In the next blog, I'll show pics from Journal Club. Monday is my day to post a project on Imagine Crafts' as an Artist-in-Residence; I'm still trying to figure out how the watermark feature works and a couple of other technical issues for the posting. We're all so fortunate that our "Mother Artist-in-Residence" John Petersen is so patient and helpful!
Our time in Scottsdale continues to be on the cool side. We dined outside at El Chorro's this evening under 2 heaters and a blanket on my lap. Yes, we could have dined inside but my husband is adamant that when you're in Arizona, you eat outside whenever possible! Luckily I've only shared dinners with him so far.


I'm glad you liked the class. We all had lots of fun!
ReplyDelete