
followed by his limo ride to the Tropicana for the Laugh Factory's Comedy Show. I laughed so hard my ribs still hurt this morning. When we left, I snapped this photo of The Excalibur Hotel because the tower colors were so vivid against the night sky.
 |
| Excalibur Hotel in Las Vegas |
From Karen Lockhart's Guest Designer website . . .
| Lockhart Stamp Company |
| Guest Artist |
|


from Cheery Lynn Designs . . .
Snowflake Merry Christmas
 |
| by Sandy Hulsart |
I love shaped cards and nothing does them better or easier than Cheery Lynn Designs Stacker dies. For my card today, I chose to use my Scalloped Coved Rectangle set along with the coordinating Silver Coved Rectangle dies. I used die number 5 (the next to the largest of each set) for my card base and background panel. Then for the next panel, I used die number 3 from each set. On the panels cut with my silver stackers, I stamped snowflakes from the Hampton Art Nutcracker Suite 1 IC0204 set using Colorbox Ice Pigment Ink. This is such lovely frosty pale blue ink, perfect for snowflakes (but a challenge to photograph!)
 |
| by Sandy Hulsart |
from Penny Black's blog . . .
Shirley-bee‘s bluesy card is so simple and elegant, isn’t it?
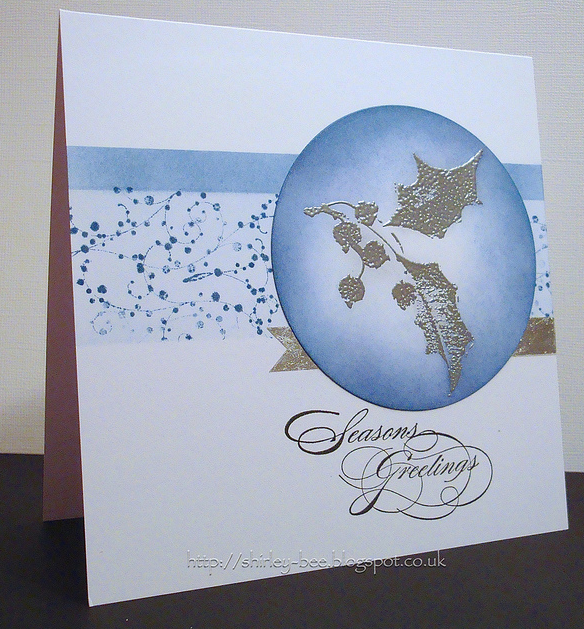 |
| Details at shirley-bee.blogspot.co.uk/2012/11/silver-holly.html |
From the blog of Lynell Harlow, owner and designer of Dreamweaver Stencils . . .
December Challenge: Frosty Fun!

Today I posted this creation on Paper Craft Planet, click HERE to see more stencil tutorials on their site. This is my frosty creation for this Thursday's Dream Schemes. I was inspired by Pam Hornschu's creations when she did a similar creation on flat ceramic ornaments. So here is my CASEing of her beautiful work. Click HERE to see what she did.

Dreamweaver Embossing Paste
Palette Knife
Paste Spreader
Removable Tape
Flat Glass Ornaments
Gothic Snowflake Ornament (LL396)
Art Institute Glitter (Blue Angel)
Pan for water/scrub brush

STEP #1:
Begin by placing one long piece of removable tape (RMT) at the top of the gothic snowflake stencil(LL396). This piece is referred to as your hinge. When it is time to remove the stencil it will be the last piece of tape to be removed.

STEP #2:
Tape out the rest of the other sides of the stencil and press the tap down firmly onto the stencil so the paste doesn't seep underneath the tape.

STEP #3:
Apply the Dreamweaver Regular Embossing Paste (DEP) to the Dreamweaver Paste Spreader(LM2010) using the palette knife(DPK).

STEP #4:
Gently yet firmly spread the paste into the holes of the stencil with the paste spreader (LM2010). Try to avoid going over the image more than once or twice. This will ensure that the paste doesn't seep under the stencil and cause the image to blur.

STEP #5:
Remove all of the tape except the "hinge" or the first piece you positioned at the top of the stencil. You now remove it just like you would flip open a hinged door. This keeps the print from getting smeared.

Add a small amount of dishwashing degreaser into a shallow pan of water and immediately put the stencil into this bath. Be sure that when you dry or wash a metal stencil you always keep them flat. This will keep them from getting damaged or bent.

For the finishing touch, while the paste is still wet sprinkle it with glitter. Because it is past-embossed on glass it will take longer for this to dry than if it were done on paper which is absorbent. This ornament was filled with giant flakes of glitter for extra Frosty Fun...
Our last night in Las Vegas; we head home tomorrow afternoon. We're not coming home with any casino winnings, but we have some very fun and cherished memories of our week. I'll 'see you' soon!
No comments:
Post a Comment