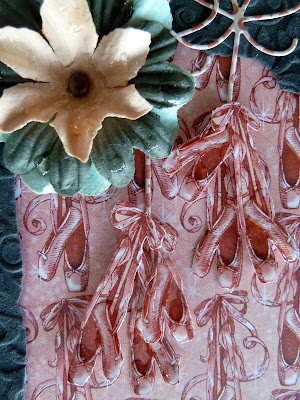
I had a birthday card to make and I used paper from Graphic 45's Nutcracker Sweet. (You don't have to make a Christmas card out of Christmas papers.) The first time I saw the ballet slipper paper, I just knew I would want to make a card for the dancer in our family.
From Els at Elizabeth Craft Designs . . .
"Our friend Judi Kauffman shared some sparkly holiday cards with us - one is just in time for Halloween, the other two will help you get ahead for Christmas. She started all of them with an AccuCut window card that cuts and scores an A2 card base, plus a mat to layer on the front. First she smudged and smeared color onto the pieces to tone down the colors and add a bit of texture, then she glued th
e mats in place. Next, she put our double-sided tape on heavy white cardstock, and on the other side (on the exposed adhesive) she added the Jack O'Lantern, cardinal and ornament peel-offs, followed by micro-fine highlight glitter (rubbed firmly to smooth it). Then she colored with Copic markers, cut out the shapes, and glued them in place, adding more peel-offs, ribbon, and for the Halloween card, a piece of leather cord. She said that if you don't have access to the window card die, you can layer a rectangle onto the card fronts to make the mat, and add die-cut circles so you are laying "up" instead of looking down through an opening. Inside the window on the ornament card is a piece of embossed Shimmer Sheetz for added contrast and another layer of texture and sparkle. (A side note from Judi: Because the peel-off sheet with the Jack O' Lantern also includes several plain pumpkins and leaves, you can make this same kind of card for fall or Thanksgiving - simply change the greeting - and make sure that whatever you use on the card front is large enough to extend beyond the window so it can be glued to the front of the card. You can, of course, also use smaller motifs that are visible through the window instead of being attached to the card front!)"
 |
| by Judi Kauffman |
 |
| by Judi Kauffman |
From Spellbinders' blog . . .
| by Candy Rosenberg |
"I love to decorate ordinary household items. This candle came with a tag wrapped around the glass with the company name on it. Lets just say that a label comes off immediately at my house! When I took the label off the candle looked so plain. Edgeabilities and some cork I just purchased along with some other fun embellishments I transformed the candle into a great addition for my dresser. And the best part, it took me less than 15 minutes to make.
Created by Candy Rosenberg
www.LivingTheAlteredLife.com
www.LivingTheAlteredLife.com
- Spellbinders Grand Calibur® Machine
- E8-011 Classic Decorative Inserts Three
- May Arts Ribbon - Green/Brown Ribbon 416-14-16
- Beacon Adhesives – Zip Dry
Using the Edgeabilities Classic Decorative Inserts Three, die cut the sticky back cork. Trim the edges down, pop out any pieces of cork that are left and ink the edges.
Remove the protective sheet from the back of the cork and run a piece of the ribbon on each side. It is already sticky, it will adhere right to the cork.
Wrap the cork around the glass, the cork will adhere right to the glass. Take a strip of bling and add to the edges of the outside of the cork using Zip Dry.
And viola, you have a new look!
Get Crafty and see what you can decorate around your home."
Sharon Wolvin from Tacoma zentangled pumpkins for a wonderful Halloween display. If Sharon's artistry inspires you, zentangled pumpkins would be terrific additions to your home for a fall and/or Thanksgiving decorative touch.
 |
| by Sharon Wolvin |
 |
| by Sharon Wolvin |
 |
| by Sharon Wolvin |
These are the same pumpkins; the images are from different angles so you may enjoy the various zentangle patterns Sharon used. Thanks, Sharon, for sharing these awesome pumpkins!
I was at Suzanne Glazier's (Pennywise Arts) home for a class, and I found something that I need to add to my home. Most all of you will know what I mean . . .
I think that about covers it!
Art 'n Soul's Journal Club meets this Friday between 4:00 and 6:00 p.m. It's fun and it's free!


No comments:
Post a Comment