From Millsrepco, a Christmas card by Dina Kowal using dies and stamp from Impression Obsession . . .
 |
| by Dina Kowal IO Stamp: C13039 She Has Wings IO Dies: Die033 Bird Set, Die020 Birdcage, Die017 Border Duo 1 |
From the Spellbinders' blog . . .
D-Lite-fully Shabby |
| by Linda Lucas |
"The new Spellbinders Die D-Lites™ Shapeabilities® are so inspiring and almost make the cards themselves, I know you are going to love them. Kazan has introduced us to the Die D-Lites™ and shared some wonderful tips that you can see here, you can also see Beate's gorgeous card here.

It was a hard for me to choose which ones to work with for this Video Tutorial as I love them all and I know you will too!
Spellbinders™ Paper Arts Supplies:
Cross Promotional Partners:
Other: Scissors, Seam Binding, Mulberry Flower, Wax Paper
Here is my Video Tutorial.
I hope you have enjoyed seeing my project with the new Die D-Lites™ Shapeabilities®, you will be seeing many more projects shared here this week!


Spellbinders™ Paper Arts Supplies:
- Spellbinders Grand Calibur® Machine
- S2-016 Window Two Die D-Lites™ Shapeabilities®
- S5-128 Fancy Framed Tags Two Shapeabilities®
- ES-009 Lovely Lattice M-Bossabilities
- JustRite® Papercraft - Botanical Butterflies
- Want2Scrap - Swirls Finesse - Creme
Cross Promotional Partners:
- KaiserCraft
- Bazzill Basics Paper® - Kraft, gold and white card
- Scor-Pal® - 1/2" Tape
- Beacon Adhesives - Zip Dry Paper Glue
- Clearsnap - Stylus - Cat's Eye Adapter Set
Other: Scissors, Seam Binding, Mulberry Flower, Wax Paper
Here is my Video Tutorial.
I hope you have enjoyed seeing my project with the new Die D-Lites™ Shapeabilities®, you will be seeing many more projects shared here this week!
Have a great weekend!!"
{{{hugs}}}
From the Zentangle newsletter from Rick and Marie . . .
New Tangle: bunzo
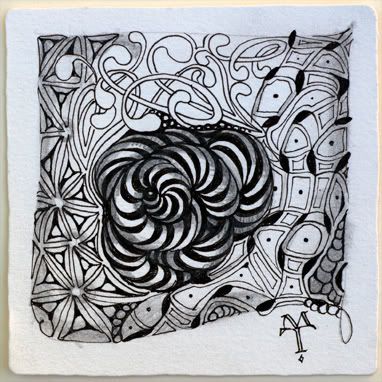
"Maria came up with this dynamic tangle which we are calling bunzo. You may have seen this appearing in some of her tiles lately.
I say "dynamic" because it is approximately 50/50 black and white. It is a great tangle to shade and it "grows" nicely to fill almost any string.
Most elegantly, this tangle is created by using just one elemental shape.
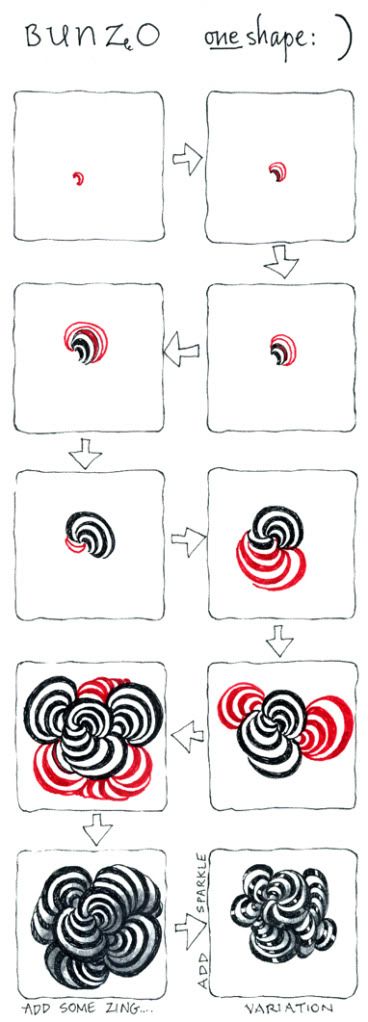
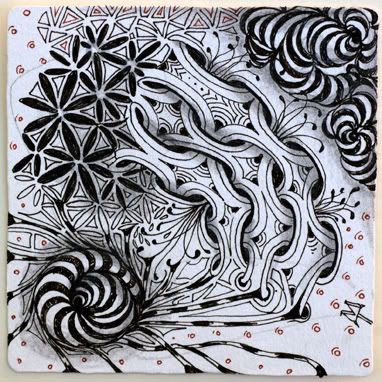
Here are some tiles using bunzo:
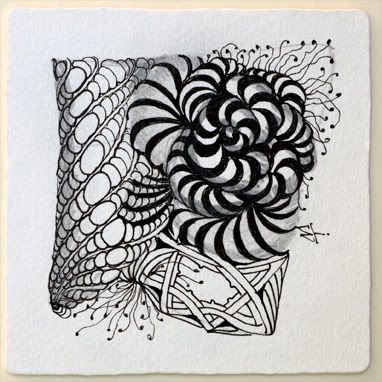
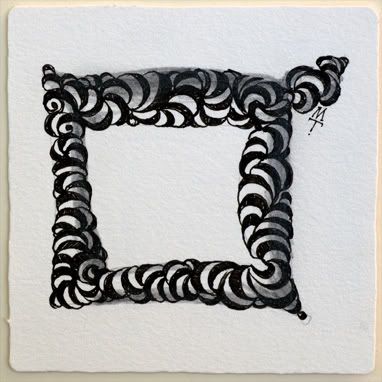

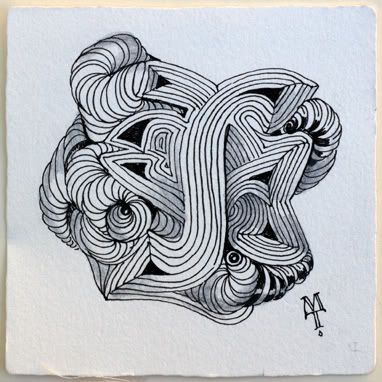
In this next one, which melds with our tangle IX, you can see a variation of bunzo done without filling in its alternate sections.
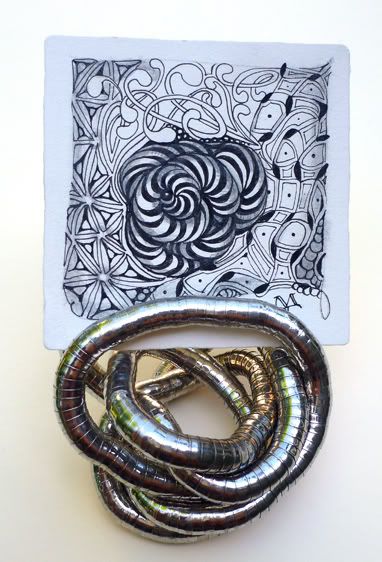
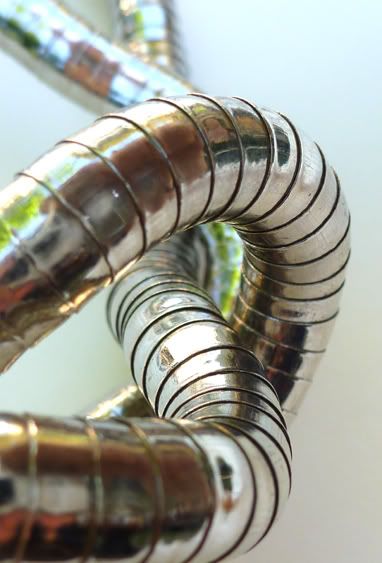
Usually we'll see a pattern and then deconstruct it to create a tangle. With bunzo, it was the other way around; Maria first developed the tangle, then we started see it elsewhere.
This example is a scrunchable necklace or bracelet that we've adapted here as a Zentangle tile holder:
Here's a picture of some nested bowls on our stove:
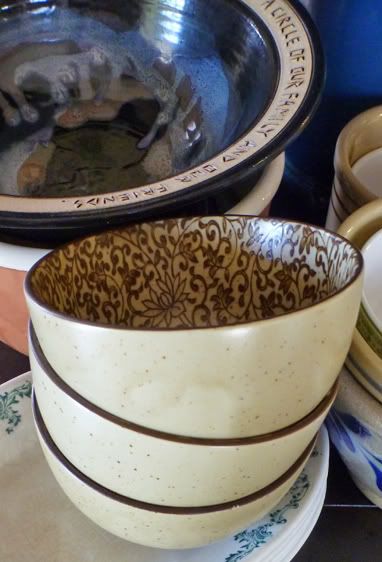
We love how this tangle continues to appear in unexpected places.
Enjoy!"
From Cheery Lynn's blog, another Halloween treat . . .
Halloween Pumpkins - Table Decorations
It is nearly Halloween! We don't celebrate Halloween in Australia, though I do believe it is something that is fast catching on. It would certainly be nice to experience Halloween, and certainly has an interesting story behind the occasion.
So, to get into the 'theme' of Halloween, for Cheery Lynn Designs I have created a decoration of pumpkins, along with a small 'Boo' tag. Cheery Lynn Designs does have a 'Boo' die, but since we don't celebrate here I have not acquired it. I hand wrote my Boo, but you can find the die 'here'.

These pumpkins are so easy to create and can be made in in a variety of sizes, easily, and quickly. AND, would look absolutely fabulous created for a table setting. I used the Circle Classic Silver Series (middle size, for the larger one) and die-cut 8 circles - folding each circle in half, and pressing firmly with a score tool. Hint: It is easier to do the folding by hand rather than use a score board due to them being round - you really do have to be precise so they match up perfectly.

Then...simply start adhering one half to the next half, and repeat till you have all affixed, except last one. Before adhering last half circle together, break a kebab stick with your hands (muscles) to fit inside the length of the circles. Place a strong adhesive into the middle of where all the half circles meet - place stick along edge of adhesive - keeping the torn, tattered end of the kebab stick at the top, and poking out of the soon to be pumpkin. Affix last half circle closed, and hold firmly till adhesive has dried, for best results.
The 'greenery' on the larger pumpkin is created with the Stacker Flower #4, and the smaller, the Stacker Flower #3. I used a crop-o-dile (any small round punch will work) to make the hole in the stacker flower larger to fit over the pumpkin stem, and adhered with a tiny smear of glue.
The tendrils are created using the new release Expandable Quilling Strip. The smallest strips on the die-cut were just wound tightly around the left over piece of kebab skewer. Apply a tiny dot of glue to one end, and neatly tuck under the stacker flower foliage.

The Scare Me die consists of the wicked little tree and cat. The cat reminds me of my cat Ms Malinki! LOL
... and before I sign off for another week, this weeks challenge is 'texture', to enter visit the Cheery Lynn Designs Challenge Blog... and don't forget to pop over for a visit and some wonderful inspiration from the Cheery Lynn Designs Blog.
Till next week..."Sandie
xxx
Supplies List:
Kebab Skewer
AC Cardstock
Crop-O-Dile
Helmar 450 Quick Dry Adhesive
Tag
Eyelet
Black Diamond Stickles
AC Cardstock
Crop-O-Dile
Helmar 450 Quick Dry Adhesive
Tag
Eyelet
Black Diamond Stickles
See you back home!
No comments:
Post a Comment