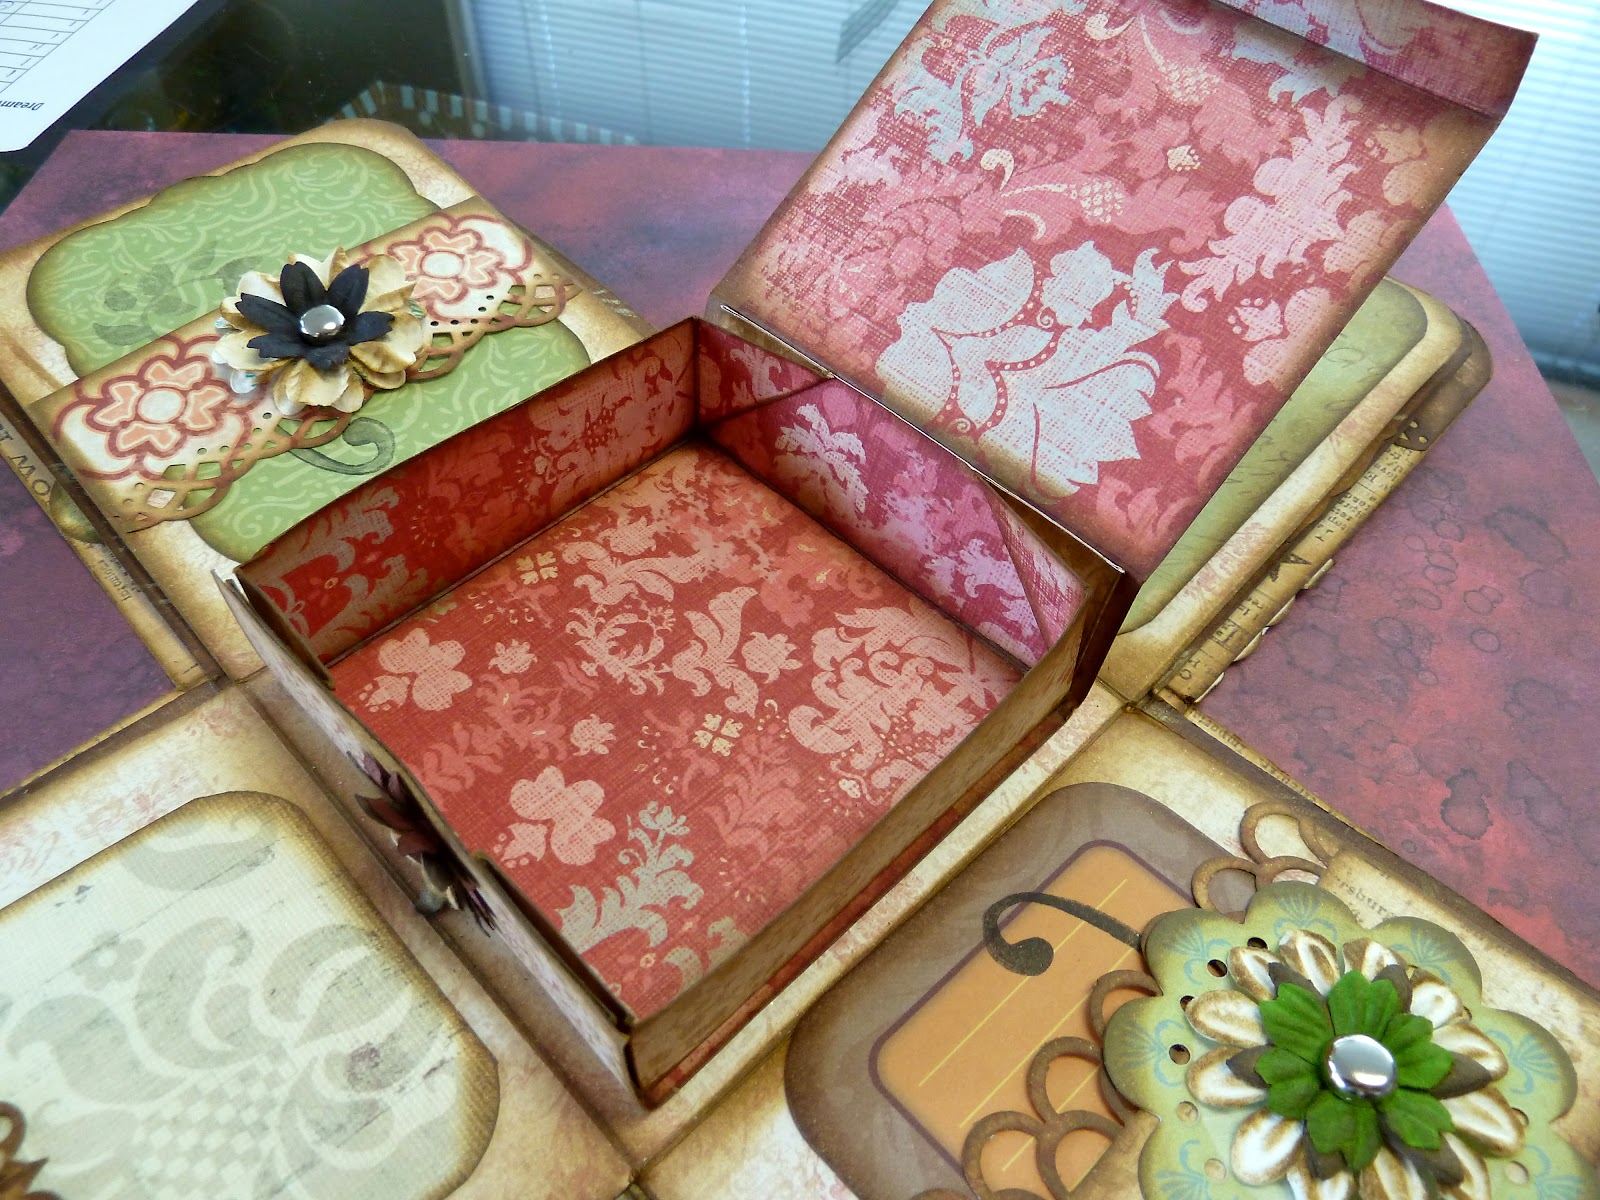
Last week, Catrina Coonc from Elma came into the store to show us her version of John Petersen's explosion box. She did not take John's class but after carefully looking at Dianne's box, Catrina went home and made one. She emphasized a lot of pockets where notes and pics could be stowed. We think this explosion box is beautiful! Take a look . . .
Explosion Box by Catrina Coonc
 |
| Top of Box |
 |
| Sides |


Dianne had a play day recently with Deb to share what she learned at Els' class when we made a jewelry pendant from Shimmer Sheetz from Elizabeth Craft Designs. Here's Dianne's completed necklace; the small beaded chain was found at Shipwreck Beads.
 |
| by Dianne Johnson |
From Magenta's blog, a new technique that leads to a beautiful result . . .
Shimmering Window Technique
"Today, I'll show a shiny technique using Perfect Pearls Powders and acetate.
Supplies:

- Magenta Stamp 42.122.P – Elegant Vase
- Piece of white cardstock
- Acetate
- Jet Black Archival ink by Ranger
- Double-sided clear sheet adhesive (Magenta)
- Perfect Pearls (Ranger): Copper, Gold, Forever Green, Forever Red, Turquoise, Forever Green
- Fine tip brush to apply the Perfect Pearls powders
Steps:
Cut out the piece of acetate to the desired size for the image.

Print the image on the acetate using Archival ink. CAUTION: Archival ink is oil-based and therefore, will not dry on the acetate, so CAREFULLY manipulate so you won’t smudge it. TIP: for a better, more even impression, place the stamp facing up on the work surface and apply the acetate on top. Holding with one hand, press into the inked stamp taking care not to miss any spots. Lift slowly and carefully while holding the stamp down so that the acetate won’t slip and smudge.
Adhere the printed acetate – printed side to the adhesive. TIP: to make sure it is well adhered without air bubbles, peel off the top protective liner off one side the adhesive, but not completely. Place the top edge of the acetate (ink down – that is how the ink will be set) between the liner and the adhesive and, using an acrylic brayer, slowly roll on top of the liner while lowering the acetate onto the adhesive, until the entire surface is adhered.
Cut around the image to the desired size and save the leftover adhesive sheet for another project.
At this point, is you wish to cut off any excess around the image, now is the time to do it.

Place the acetate on the work surface to face you, and remove the second liner. Don’t discard the liner, rather use it to hold down your acetate while you work.
Using the fine tip brush, start « painting » the image. You will be putting the powders over the adhesive, which is how they will be set. Be careful to take small quantities at a time and not moving too fast to avoid dropping powder all over your adhesive sheet. To see how your work is coming along, you can turn thee acetate over to look (don’t put it down on the adhesive though ;-)) The color will be translucent.

Once finished, the image will look something like this:

It is important to cover all the adhesive well with the powders. It is normal that the drawing seems unclear and “smudged”. To see the final result, turn it over.

The photo doesn’t do this technique justice. The effect of iridescent powders behind acetate is stunning. Now, all that is left to do is mount the image on a card. No need to decorate a lot, the image is the real star, here. Because the adhesive is completely covered in Perfect Pearl Powders, it no longer sticks. Just use your regular double-sided tape to affix it to a card front, or add another layer of the sheet adhesive, over the powders.
I hope you will be inspired to try this technique. Why not use it as part of a Magenta's twentieth anniversary challenges?"

We've enjoyed two terrific classes at Art 'n Soul this past weekend . . . a Lacey Box from Some Assembly Required, and a Book in a Box project from John Petersen. I do have photos that I will share with you.
It's late . . . I'll be back! Thanks for understanding a somewhat erratic schedule right now. In the meantime, please stop in and see what's coming up and what's been coming in.
No comments:
Post a Comment