I’ve always loved working with the dies and stencils from Memory Box, and now our Artists-in-Residence have been asked to combine the die designs with products from IMAGINE Crafts/Tsukineko.
 |
| by Debbie Gaetz Artist-in-Residence for IMAGINE CRAFTS |
- IMAGINE Crafts/Tsukineko: Fireworks!! in Tangelo, Cantaloupe, Pear Tart; irRESISTible Texture Spray in Dandelion; Ink Potion No. 9 Ink Blending Solution for Water Based Inks
- Memory Box dies: Elliana Detail Plate 98953; Elliana Backgound Die 98956; Cirque Alphabet Tags 98812
- Lifestyle Crafts Embossing Folder - Lattice EF0030
- Prismatic Card Stock in Black (base panel, die overlay and small panel)
- Heavy Vellum in white
- Pre-folded card base in ivory (6.25” x 5”)
- Mirrircard Card Stock in copper
- Mizuhiki Japanese Paper Cord in Red Nishiki (MHN194)
- Midori Halloween “Boo” ribbon
- Tombow MONO Multi Liquid Glue; ZOTS glue dots (mini)
- Cut the black base panel to 4-7/8” wide and 6-1/8” top to bottom. Adhere to the front of the base card.
- Cut another black piece 4-1/4” wide and 5-1/2” top to bottom.
- Cut two pieces of the heavy vellum to 4-1/4” wide and 5-1/2” top to bottom.
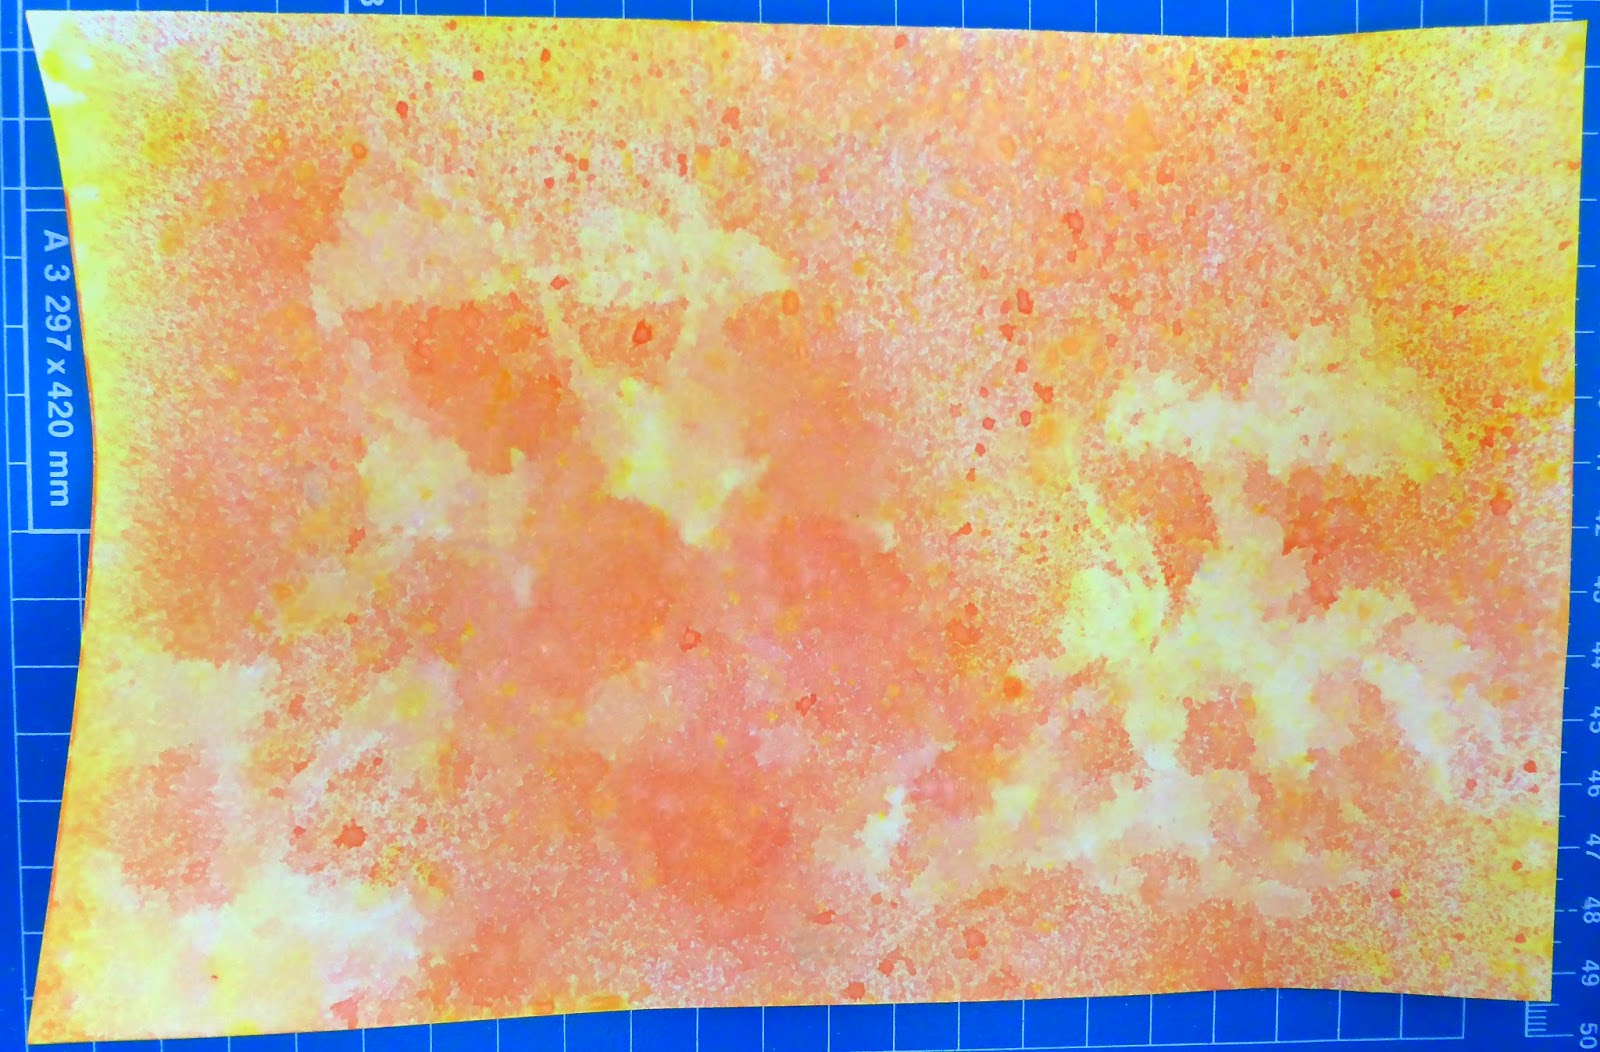
- Spray one of the vellum pieces with Ink Potion No. 9*, followed by irRESISTible Texture Spray in Dandelion, Fireworks! in Cantaloupe, touch of Pear Tart, and good overlay of Tangelo. Dab with a paper towel very lightly to pick up any puddles.
- While the sprayed vellum is drying, emboss the other piece of vellum with the Memory Box Elliana Detail Plate. Adhere to the black card top panel.
- Die-cut the colored vellum piece (back-side of vellum face up and the colored side closest to the metal die) and the black piece with the Elliana Background Die. Before removing the steel die from the vellum piece, tape the backside with removable tape so the pieces stay intact; make sure the tape strips stick out from both sides to act like handles when you remove the vellum from the die.

- Adhere the individual vellum die pieces onto the embossed vellum base in the appropriate spots. If you keep the pieces intact with the low-tack removable tape, it will make finding the appropriate pieces much easier. If you didn’t keep the pieces taped together and you enjoy putting puzzles together, this won’t be a problem.
 |
| Spray colored vellum piece on the left; white vellum piece embossed with Elliana Detail Plate on right. |

- After the individual pieces are attached, emboss the black overlay die-cut with the Lattice embossing folder.
- Adhere the overlay die-cut to the card top. There will be small traces of the white vellum showing because the dry embossing has stretched the paper. The white peeking through adds another element of depth. Where there are very, very tiny die cut specks, leave those spaces open.

- Cut a small piece of black card stock 3-3/8” wide by 1-3/16” top to bottom. With a very small paper punch, make a hole on each side of the piece approx. 3/16” to 4/16” from each side to thread the Mizuhiki cord.
- Die-cut 2 sets of the Cirque Alphabet Tags with the copper mirrircard. Use one (1) b and two (2) o’s to spell boo. Hang the letters from the Mizuhuki paper cord on the small black piece and secure each letter somewhere on the backside with a mini Zot. Secure the paper cord on the backside with tape.
- Adhere the small piece at an angle on the left upper part of the card top.
- Tie a small bow with the Midori ribbon and adhere with a Zot.

Very cool techniques Debbie.
ReplyDeleteThank you, Cindy. I love this die!
Delete