From a previous Paper Zone blog . . .

from Cheery Lynn Designs
Four Different Flowers - Tutorial

Please Note: This post is graphic intensive.
I love making flowers! So this week I have created some flowers using a range of different Cheery Lynn Designs dies, and created quick tutorials for all 4. It is important to remember, that any of the Cheery Lynn Design dies can be used to create these version of flowers, the results may vary from flowers photographed, but still just as beautiful.
Leaf Flower #1

Requirements: Stacker Flower #1 (Leaf) and Snowflake 5. Crystal Embossing Tool which is available from Diamond Card Craft. You will also need a set of 3 flowers from the Darling Daisies die. Mini Mister either with water or glimmer mist, adhesive, distress inks, brad, card stock.

1. Cut out 3 or 4 Stacker Flower #1 depending on how full you wish your flower to be. I used 3. Cut one Snowflake 5 for the base of finished flower.
2. Ink all edges to your liking. On a foam mat (mouse mat works well) use a skewer to impress the centre of leaves - this is where your brad will go when flower is constructed.

3. Mist all of your leaves/petals and while the leaves are damp, roll using a skewer. I find a skewer the best as it is a small size.

4. Allow to dry in the leaves newly formed shape - see below photograph.


6. When all flowers have been slightly curled, turn right side up and press a skewer or small ended pen into middle. This is where your brad will sit.

7. Adhere carefully (I use Glossy Accents for a quick dry) the 3 flowers together as below.

8. Start assembling your flower together. Three small Darling Daisies first, then the 3-4 Stacker Flower #1, and your Snowflake 5 at the base. Once assembled, fiddle with the petals of your flower to get them how you would like them to sit. *see photo below.
9. I adhered small pearls onto the ends of each snowflake point to give the appearance of small buds.

Dies Used:
Sweet William Flower
Requirements: Sweet Williams die, and Stacker Flower #4. Distress Ink, Brad, Adhesive, Cardstock, Shimmer Paper.

2. *see photo above - Fold each petal in half and then each half again in half, the opposite direction - much like a fan. This is fiddly and time consuming, but the results are worth the effort.

3. Assemble the 3 small Sweet William petals together, adhere making sure each petal layer sits neatly between the other petals - in other words, leave no gaps. Do not adhere petals one on top of the other, make sure you adjust so petals sit over 'vacant' area between petals.
4. Repeat for 3 larger petals.

5. Place glue into centre of larger petal base flowers, add smaller petals and press firmly with the end of a pen into middle.

6. Pressing firmly raises the petals upwards and helps form the fullness of the flower.*see photograph below.

7. Add the Stacker Flower #4 to base of flower, thread through the brad and secure. *if you do not have brads, you could always adhere a pearl to centre, as the adhesive keeps the flowers together as you construct each flower anyhow.

Judy's Blooms - Flower 3

Requirements: Judy's Bloom, Snowflake 6, Darling Daisies, Cardstock, brad, distress inks, skewer and pearls.
2. Use a skewer to roll each petal as shown in above photograph. *please note: each petal from each die cut has been rolled in two different directions. Base petal is rolled downwards, next upwards. Repeat for smaller petals.

3. Adhere larger petals together, so that the rolled petals interlink between each other. *see photograph above. Repeat for smaller petals and add the mediumDarling Daisies petal into centre of smaller petals.

4. Adhere the two layers of petals together, pressing firmly in middle with end of a pen.
5. Place brad through flower, attaching the Snowflake 6 to the base - add pearls to each point if desired.

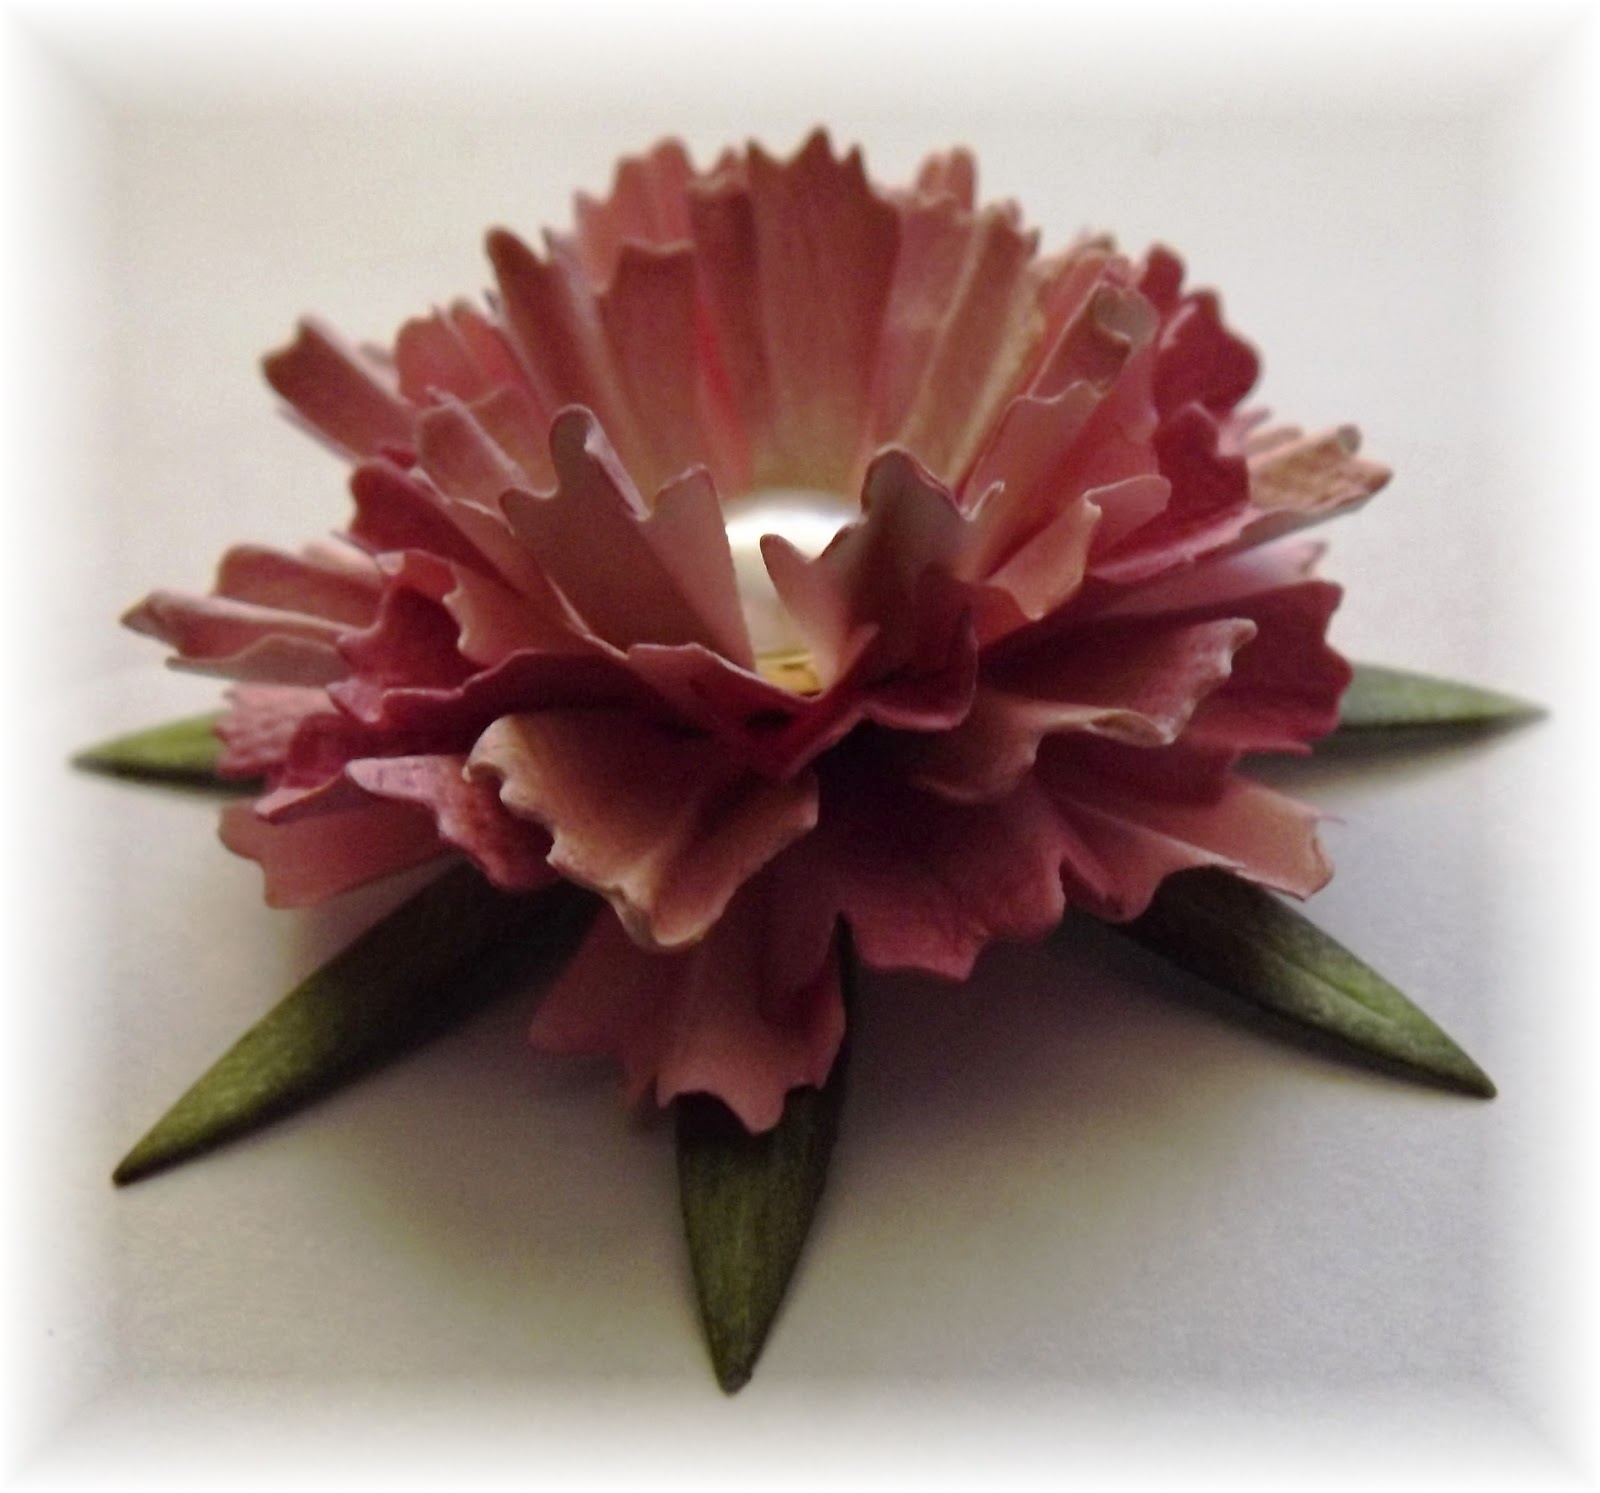
Rose

Requirements: Miniature Rose, Medium Rose, Large Rose and Snowflake 5. Crystal Embossing Tool which is available from Diamond Card Craft, cardstock, paper, glue and distress ink.

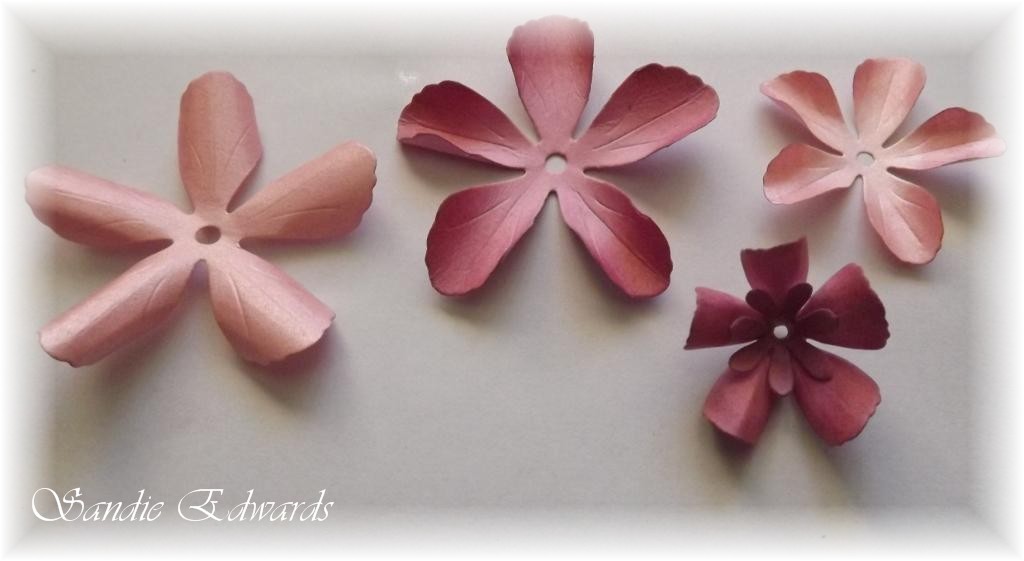
1. Cut a range of petals for your rose from the Miniature Rose, Medium Rose andLarge Rose. How many petals you wish to add, depends on the fullness you wish to achieve.

2. Use a mouse mat and embossing tool to curl your Large Rose petals. The larger bottom layers are created by laying petals upside down on matt and embossing so that when the right way, the leaves are curled downwards. Repeat this with several of the Medium Rose petals.
3. Adhere the petals into 'doubles', making sure you have the right sizes together. *see above photograph. For my rose, I used 4 large petals for the base, and adhered two medium petal on top of of the larger petals. This creates the 'base' of the rose.

4. Curling your medium rose petals the opposite way - upwards, start layering on top of your flower base to the fullness you desire.

5. Using the Miniature Rose, cut 2 petals from die cut and roll to form a bud. Adhere the remaining petals around the bud, to complete the centre bud. *See photograph above and below.

6. Carefully adhere your centre bud into the middle of your constructed rose base to complete your rose.
7. Remove longer portion of Snowflake 5, as pictured below. Adhere to base of rose.

8. Fluff the petals when glue has dried to how you like your rose to look.

Dies Used:

Hope this inspires some beautiful flowers to be made!
Don't forget this weeks challenge! The theme is "Red and White" - all details can be found "HERE".
Wishing everyone a fantastic and creative week...
Sandie Seen on blogs at Memory Box . . .
Lovebirds in Red
It seems like an odd combination - but I love using gray and brown together, especially with a bright pop of metallic red. Here's an idea featuring four dies - Grand Heart 98254, LaRue Heart 98255, Pastry Labels 98107 andPoppystamps Nestled Bird 817.
The Grand Heart and LaRue Heart are cut from prints in the Pixie 6x6 Set. The label is cut from Kraft Cardstock, stamped with Love and Hearts B1423 (hearts are attached to the side of the stamp) in Cranberry ColorBox Pigment Ink and embossed with detail clear powder.
Attach Scor-Tape to scrap red cardstock and diecut Nestled Bird twice - once with the lined tape on the top, and again with the lined tape on the backside. Burnish Clearsnap Cherry Pie Designer Foils onto the adhesive on the right bird - red-foil side up. (Impress sells Designer Foils.) Brush Clearsnap Ruby Slippers onto the adhesive on the left bird.
Layer the heart over strips of Vanilla Bean Distressed Dots and Gingham Cardstock. Attach everything to a Mars Shimmer A2 Card. Attach the greeting strip with antique copper mini-brads. Coordinate the card with a matching Mars Shimmer A2 Envelope.
Stamps, dies and papers from the beautiful 2012 What's in the Box? release will be featured in the Memory Box 2012 classes at the Belleuve (Saturday) and Tukwila (Sunday)Impress stores this weekend. Dave and Monica and their entire team have created their best-ever collection. I know I say this about every release - but you really need to stop by the Impress stores to see what everyone's been talking about. Really.
We're having a Design Team Blitz next week - on the Outside the Box Blog - showcasing the new products in great designs for every occasion. There'll be contests and prizes too - with designer posts several times a day...join us!
Drift Flowers x 2
Hello Memory Box fans! This is going to be a fun week. The What's In The Box 2012 release is so full of beautiful stamps, dies and papers. One of my favorite images is the new Drift Flowers. Today, I have two cards to share using this stamp.
I started with a new Aloe notecard and using Ranger's Brushed Corduroy ink, I stamped Mail Definitions Background (G1839) along the bottom. On a piece of cream cardstock I used Ranger's Bundled Sage ink with the Distress Garden Journal (G1848) stamp - it matches the card color perfectly. I ran a distressor tool around the cream cardstock to rough up the edges. The Drift Flowers image (D1841) was stamped next with the Brushed Corduroy and the flowers were dotted with Pale Lilac Copic marker. The "dotting" as opposed to coloring the flowers ensures no bleeding of the Corduroy ink. I finished the flowers with crystal glitter highlights. There are three new greetings and I picked "just a note to say hello" (B1852) which I stamped onto a scrap of Aloe note with the Corduroy ink. Using brown and white Divine Twine, I tied the greeting around the cream cardstock piece and attached this to the card with foam tape.
Next - I used the Drift Flowers for this thank you card.
This is a quick, simple card using the negative space of a die. Start with a 4 x 5.25 piece of white cardstock. Line up the Script Thanks die (98240) along the bottom and cut. Be sure to save the small inside pieces to complete the letters "a" and "k" on your card. Take the Drift Flowers image, inked in Ranger's Shabby Shutters and stamp several times across the white. Edge this with the Corduroy ink and adhere to the Begonia note. Dot the flowers with Pale Pink and Shadow Pink Copics for a little depth and finish with glitter highlights.
 |
"Judi Kauffman sported an eye-catching armload of Shimmer Sheetz bracelets at CHA. Here's how she made them: 1 Start with flat DIY Bangles made of unpainted wood. 2 Add quick-drying color to the sides and interior of the bracelets with StazOn inks. 3 Emboss Shimmer Sheetz with folders from various companies. 4 Alter the embossed Shimmer Sheetz with with alcohol inks (Judi used some from Tim Holtz's Ranger collection, some from the bright new palette of Color Solutions from Dreamweaver ). 5 Cut the embossed and altered Shimmer Sheetz into bands to fit the width and circumference of the bracelets and attached the bands with Be Creative Tape. (Use a craft knife, straight edge and cutting mat - it's easier than cutting narrow strips on a paper trimmer) 6 For a patchwork effect, use short pieces instead of one long band. 7 Options: Add extra bling with glitter line peel-offs. For added durability, seal with a brush-on sealer like Mod Podge, Glossy Accents or Diamond Glaze. For added texture, hammer on some decorative nail heads. ***There are definitely going to be more bracelets in the near future. If this project sparks your ideas, we'd love to see what you make!" |
No comments:
Post a Comment