I found a way to quickly re-start and finish my 'take-away' card . . .


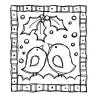 |
| MAGENTA STAMP: Birdie Holly |
Two versions I'm playing with . . .
 |
| by Debbie Gaetz It's hard to see the detail. Image is stamped on kraft cardstock. Border on the left is colored with my special glitter pens in red, green and purple, and trimmed with silver. Gliter pen also used on holly berries. Colored holly, birds, et al., with Tsukineko's Memento colored markers. Border on the right is colored with red Memento marker, dotted with silver glitter pen. Remainder of card colored with Tsukineko's Memento color markers. |
Now to figure out the rest of the cards for these two tops.
My most favorite holiday stamp from Magenta is the Large Poinsettia because of its beautiful detail work. I stamped this one with Tsukineko's Encore Ultra Metallic in green and embossed with clear embossing powder.
 |
| by Debbie Gaetz MAGENTA STAMP -- Large Poinsettia |
It's figuring out what to do next without disturbing the monochromatic effect of the metallic green on a sage-green color paper.
From the Penny Black blog . . . (I think the 'patterned paper' are the papers from My Mind's Eye Christmas Lost & Found collection). I've seen this stamp in our Penny Black catalog; this card design deserves to be delivered to your best 'fashionista' friend!
Fashion Delivery by Peet
by Jenyfur | <><>
"Peet Roeven is here today, sharing an elegant card she created for this week's theme. Peet used one of our Fashion Girl stamps, pieced with patterned paper."
 |
| by Peet Roeven for Penny Black |
Back to prepping for my 12 Days of Christmas book class on Sunday afternoon. There are a couple of openings if you'd like to sign up. All of the page trimming will be done for you because I want you to focus your time on making your doors and embellishing the book the way you want to. The papers are from Webster's Pages Botanical Christmas collection.


From Elizabeth Craft Designs . . .
 |
by Judi Kauffman for Elizabeth Craft Designs |
 |
From SEI's blog . . .
Easy
Gift Bag from Club SEI (from their November 14 posting):

To kick things off, we are going to teach you how to make a basic gift bag, inspired by a past club kit project. Making your own gift bag can save you money. Use the concept in any size you want for a custom fit. Gift bags are perfect for odd-shaped items. All you need it two pieces of paper, some ribbon, and embellishments.

DIRECTIONS:
1. Score in 1 1/2” on the bottom & sides of (2) 12” x 12” pieces of paper (one for the front of the bag and one for the back)

2. Cut along one side of
each of the 1 1/2” squares in the lower corners of each sheet (as shown in the
diagram above)
3. Use decorative scissors along the top edge of each sheet
4. Nest the two halves inside one another to form a bag & secure with adhesive
5. Punch holes & thread ribbon to make a handle
6. Embellish as desired
3. Use decorative scissors along the top edge of each sheet
4. Nest the two halves inside one another to form a bag & secure with adhesive
5. Punch holes & thread ribbon to make a handle
6. Embellish as desired
That's it for today . . . bundle up and stay warm! I'm leaving in an hour for Seattle to attend my husband's annual Board of Directors dinner at Morton's. (Did I say 'moo'?)
No comments:
Post a Comment